In this guide, we will explore the different options available for showing/hiding courses and their individual elements. Additionally, we will discuss how these actions can impact both learners and visitors.

To prevent newly added or unfinished courses from being visible to visitors or enrolled learners, a course is initially hidden (unpublished) at the time of creation.
Showing and Hiding Entire Courses #
To show or hide an entire course:
- Navigate to the Courses page.
- Locate the desired course and click on the three dots icon under Actions.
- Select the “Show” or “Hide” option from the menu that appears.
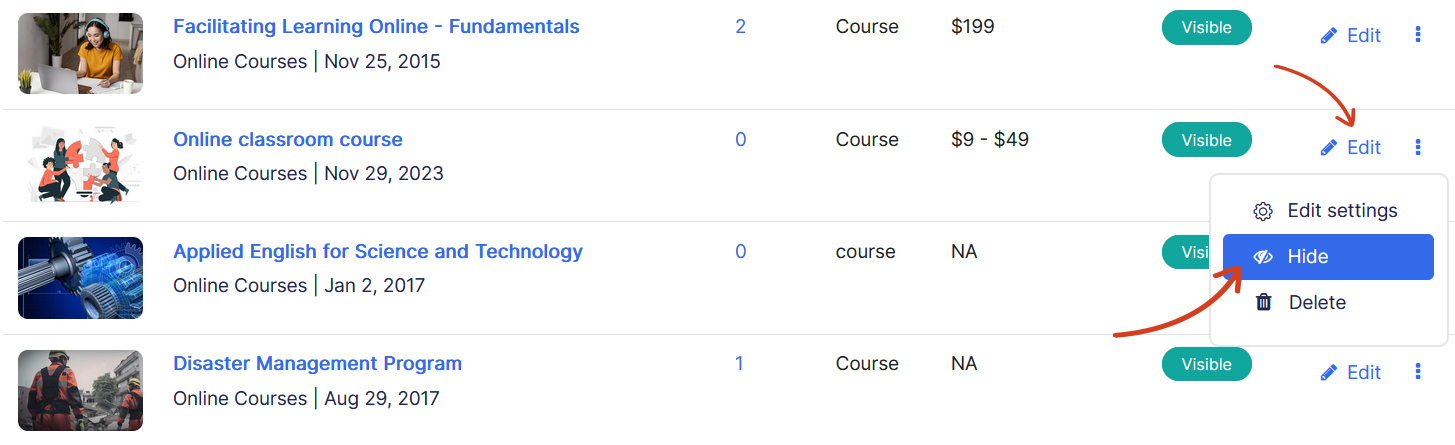
Warning: Hiding a course will remove it from the view of both visitors and enrolled learners, potentially causing confusion for learners who are in the middle of the course.
Manually Showing and Hiding Course Sections #
Individual sections of a course can also be shown or hidden manually, which can be useful for controlling access to specific content.
To manually show or hide a course section:
- Navigate to the Courses page.
- Click on “Edit” under Actions for the desired course.
- This takes to Course Builder page. Ensure that the Edit mode is activated on the Course Builder page.

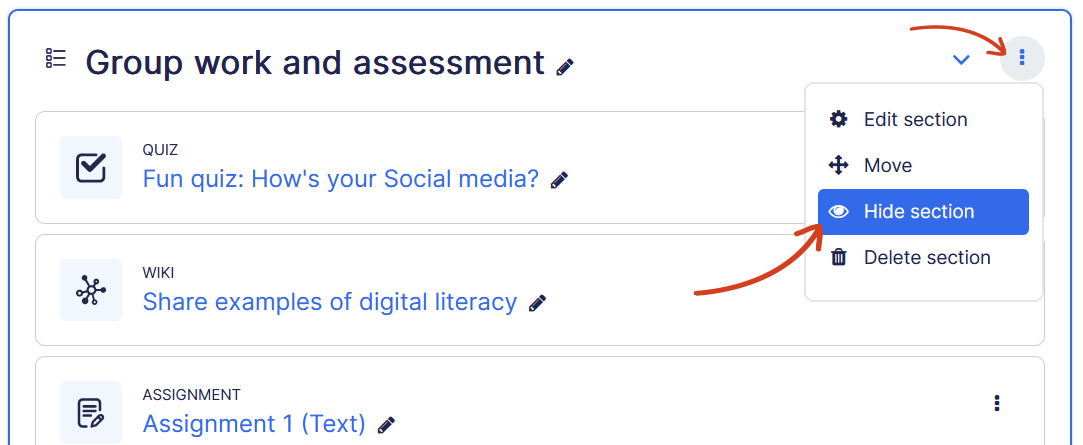
- Navigate to the section you wish to hide, then click on the three dots icon to open more options. Select “Hide” to hide the section.
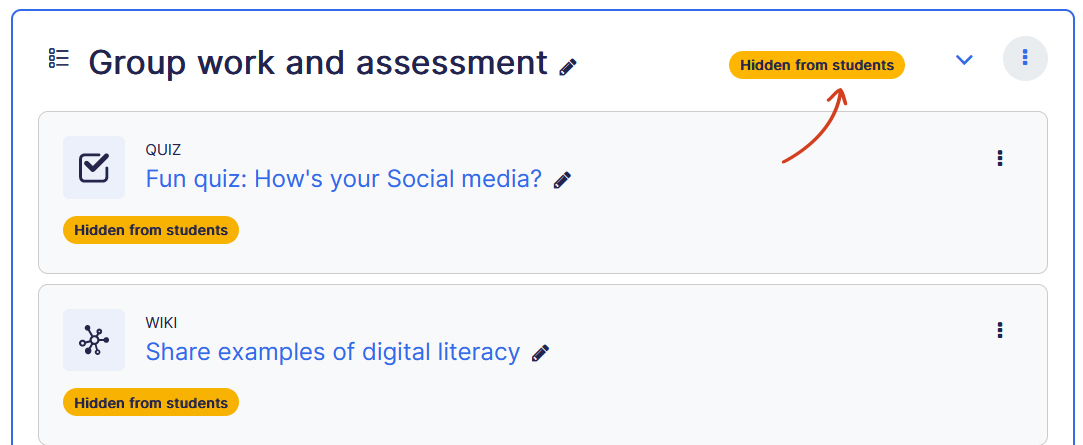
- This will hide the course section and elements of this section too.
Conditional Showing and Hiding of Course Sections or Elements #
In addition to manual control, course sections or elements can be set to automatically hide or unhide based on specific conditions. This feature is particularly useful for scenarios such as drip content release or unlocking content after certain criteria are met. For more information on the various conditions that can be applied to course sections or elements, refer to our detailed guide here.
To set course sections or elements to auto-hide/unhide based on conditions:
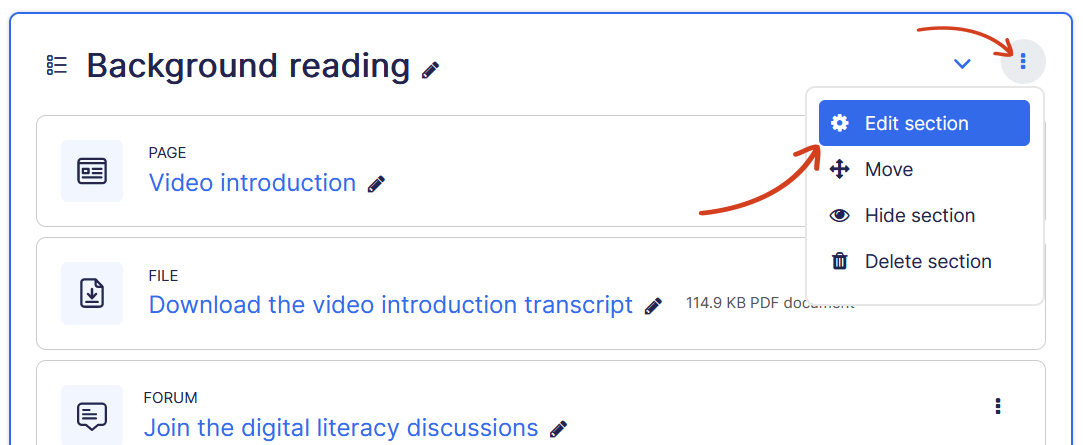
- Click on the three dots icon for the desired course section or element.
- Choose “Edit section” for sections or “Edit settings” for elements.
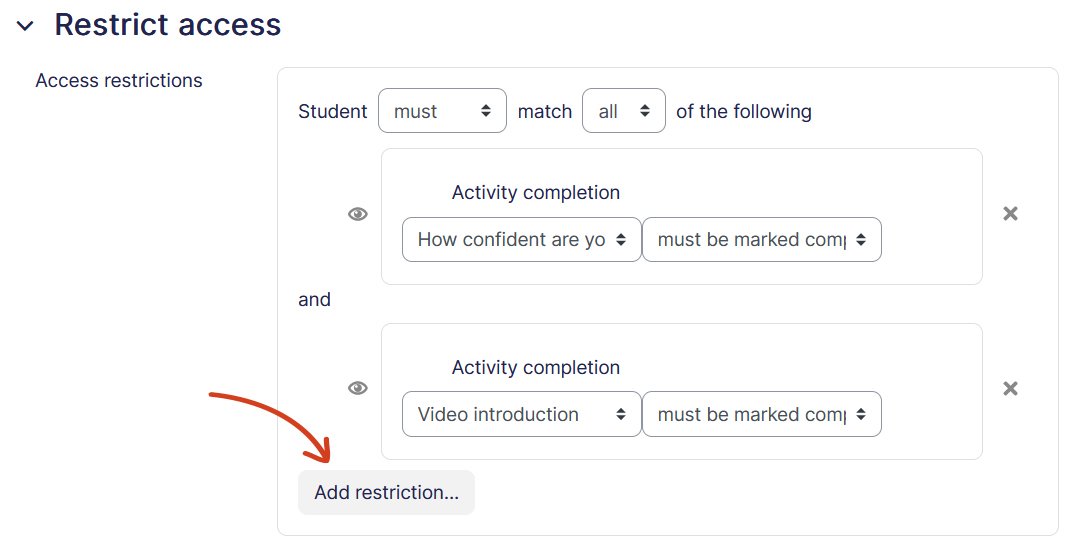
- This opens the settings page. Navigate to the “Restrict Access” tab. Click on the “Add restriction” button to define the conditions.
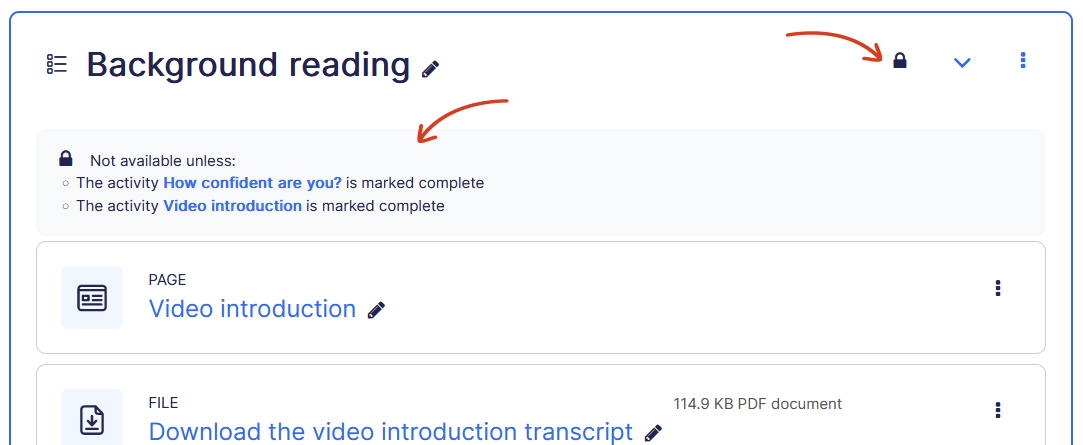
- Once conditions are configured, the section or element will display a lock icon, along with the conditions that need to be fulfilled to unlock it.
For more information on the various conditions that can be applied to course sections or elements, refer to our detailed guide here.