
The Custom Certificate module creates PDF certificates that can be awarded to students in a course. Based on certain conditions, course creators can restrict access to the certificate. Once achieved, students get an email notification having a certificate’s PDF which can be downloaded and printed.
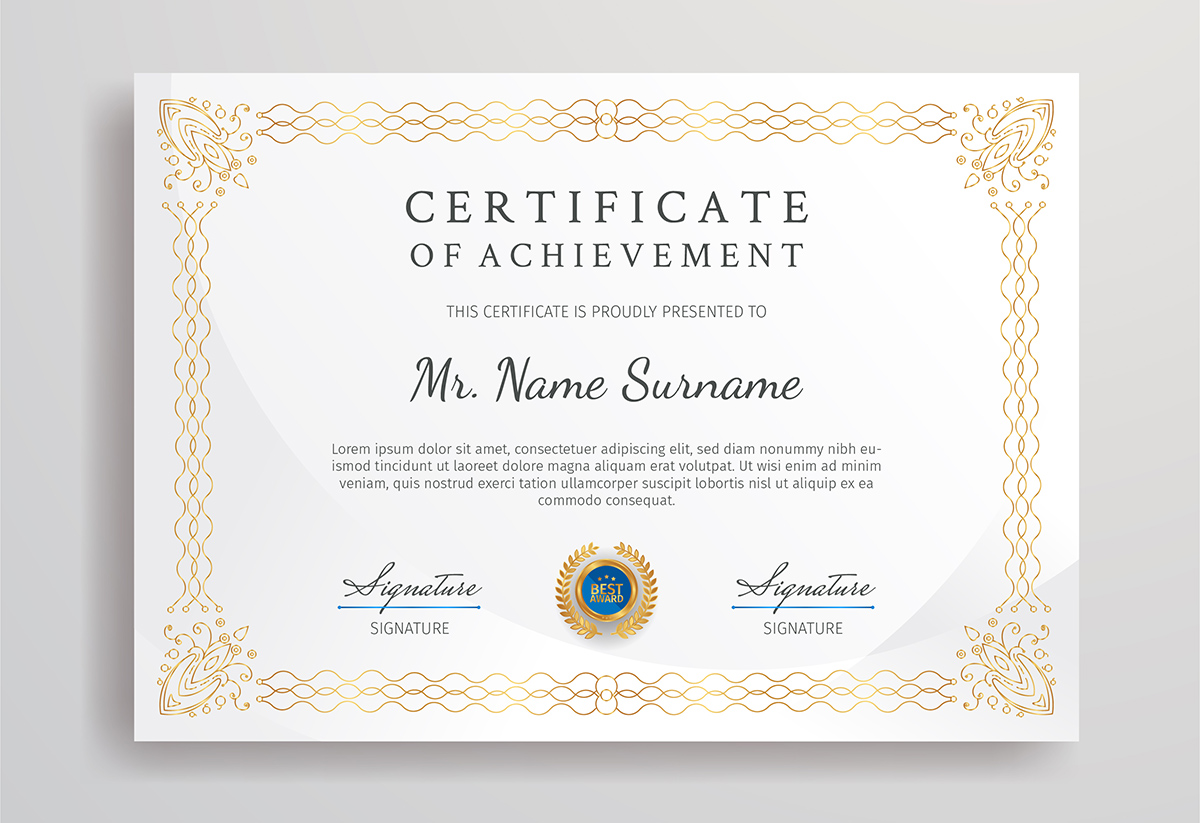
Features of a Custom Certificate module:
- Certificates can be customized to a great level such as adding certificate template background, watermarks, seals, signatures, expiry date, course name, student name, outcomes, grades and even adding custom text.
- Certificates can be saved as global templates and then can be reused in other courses.
- Email notifications can be sent to student, teacher or other once a student achieve certificate conditions.
- You can set protection against Print, Copy and Edits.
- A required time spent (in minutes) can be set before allowing access to the certificate.
- Teachers can view a report of all issued certificates within a course.
- The authentication of Certificates can be verified with a unique code.
‘Custom Certificate’ module is a different module than the Certificate. Custom Certificate offers way more options than a Certificate could do which is the same reason Custom Certificate activity is recommended to use over Certificate.
Adding a Custom Certificate #
To add a Custom Certificate:
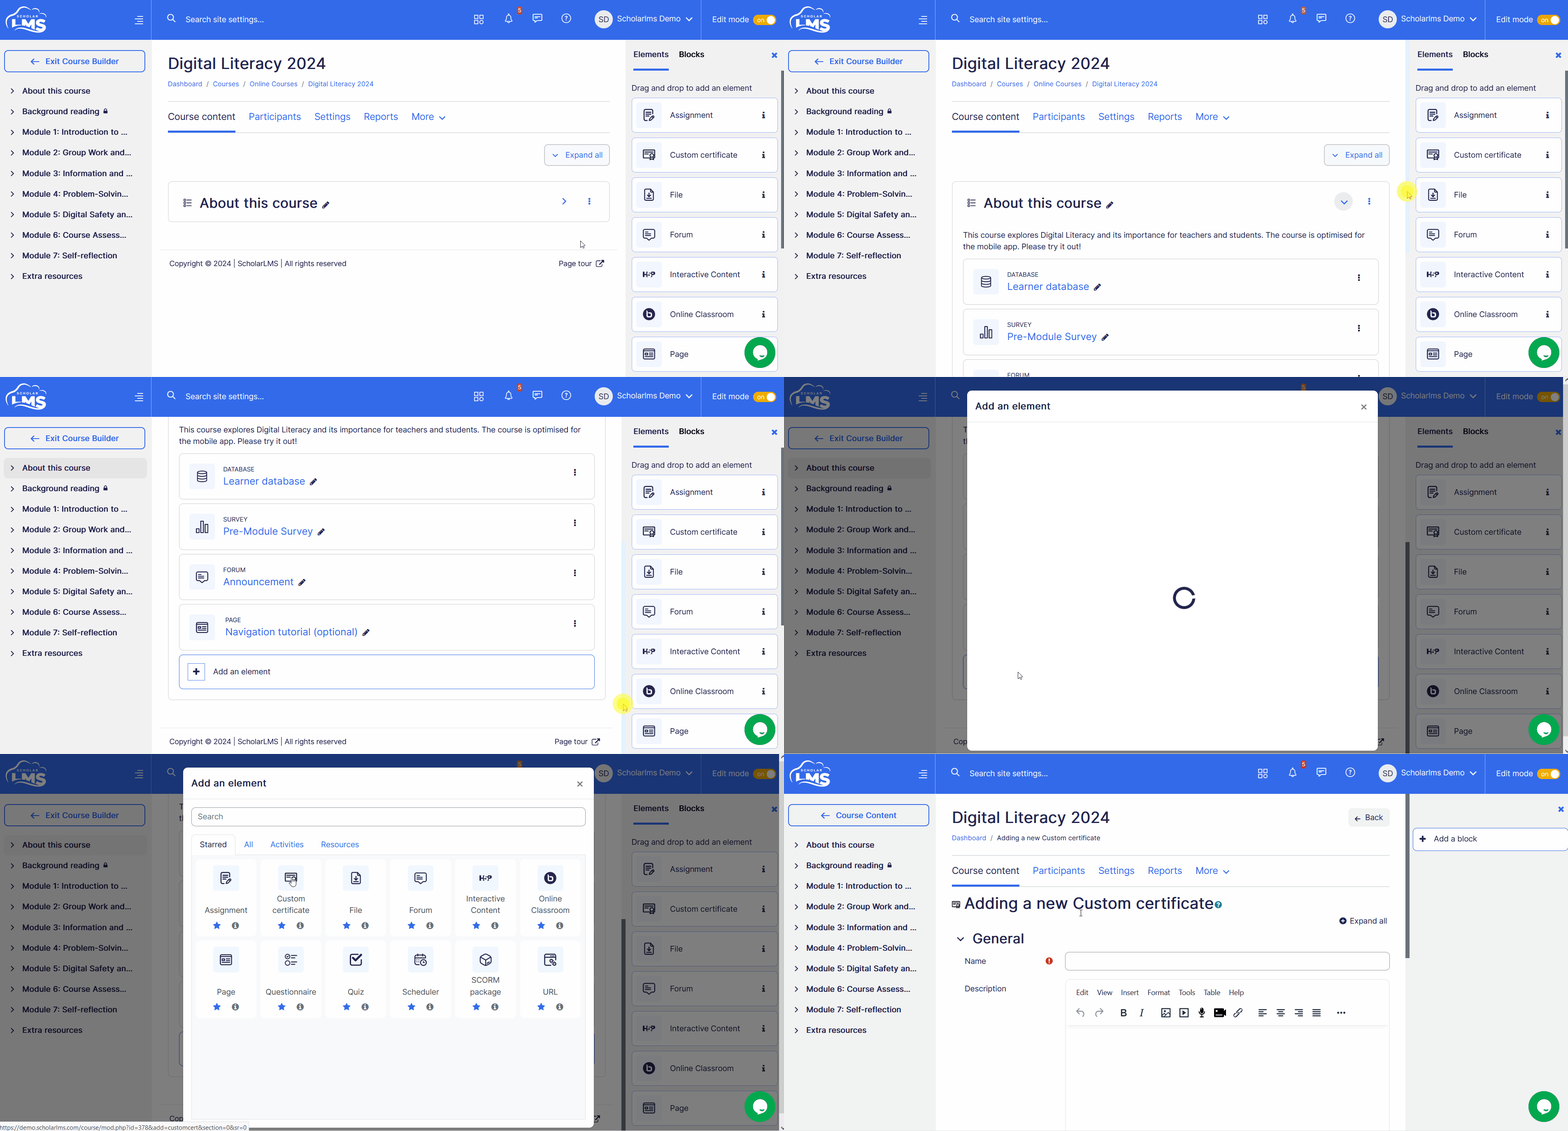
- Navigate to the Courses page.
- Click on “Edit” under Actions for the desired course.
- This takes to Course Builder page. Ensure that the Edit mode is activated on the Course Builder page.

- Navigate to the Course Section, click the ‘Add an element’ button, which opens a pop up window, add Custom Certificate.
Certificate Settings #
This section explores the settings for the Custom Certificate once you have added it to your course.
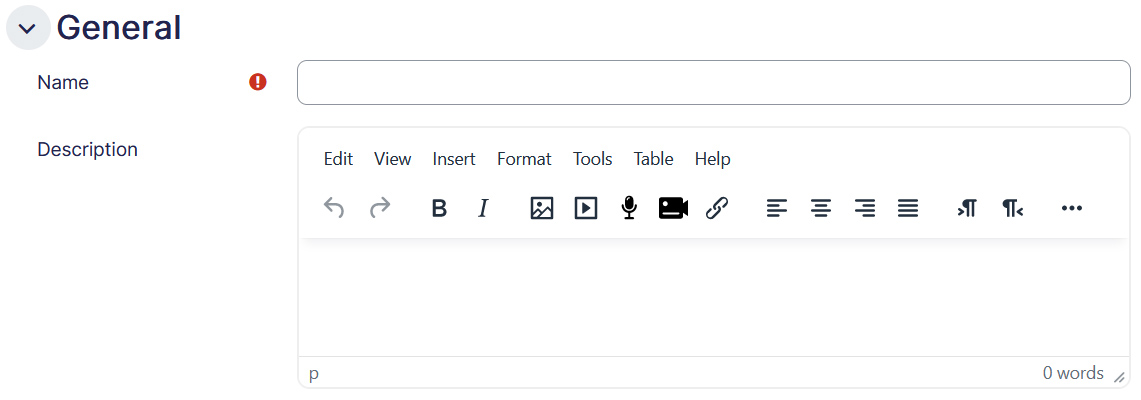
General
- Name – This is a mandatory field, put in the name as you desire.
- Description – Any details about the Certificate could be put in here. If “” is enabled, it will display the description on the course page below the Certificate title.
Options
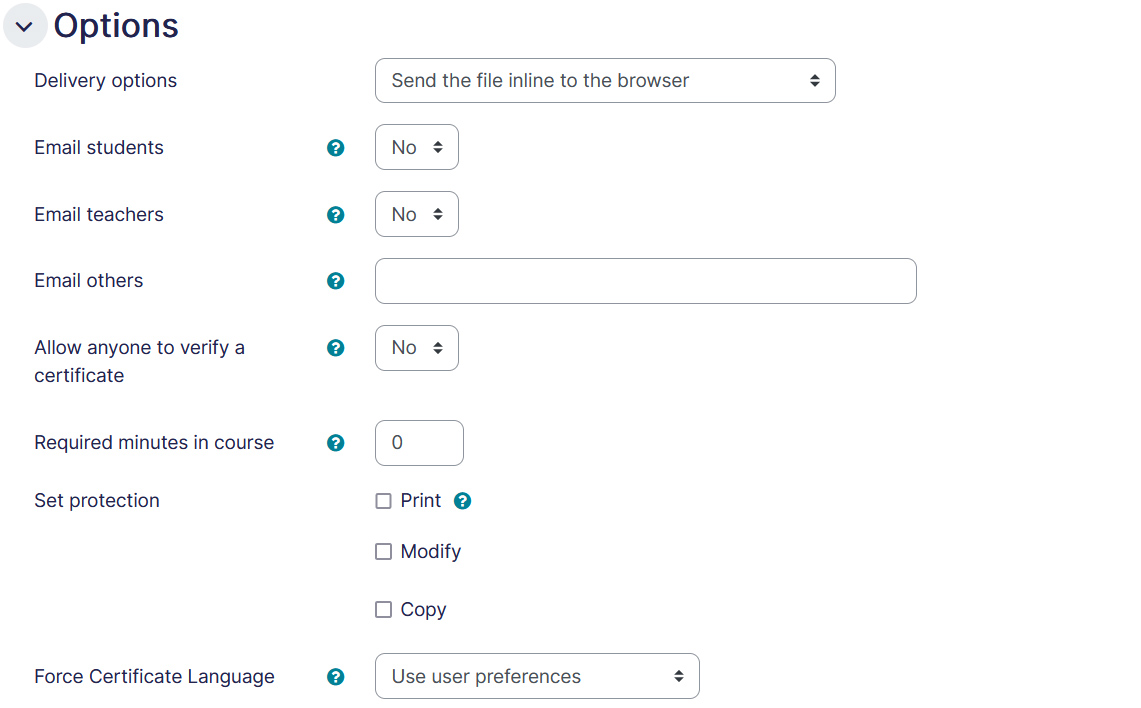
- Delivery options – Choose how student should access the certificate on web browser.
- Email students – If enabled, will send an email with a copy of the certificate to students when it becomes available. Warning: If enabled, before you have finished setting up this certificate will send an incomplete copy of the certificate.
- Email teachers – Same as above, send an exact copy of the certificate to teachers.
- Email others – Same as above, but to any other email than student and teacher.
- Allow anyone to verify a certificate – This setting enables anyone with the certificate verification link (including users not logged in) to verify a certificate.
- Required minutes in course – Enter here the minimum amount of time, in minutes, that a student must be logged into the course before they will be able to receive the certificate.
- Set protection – Choose the actions you wish to prevent users from performing on this certificate.
Common module settings
- Availability – If the availability is set to ‘Show on course page’, the activity or resource is available to students (subject to any access restrictions which may be set). If the availability is set to ‘Hide from students’, the activity or resource is only available to users with permission to view hidden activities (by default, users with the role of teacher or non-editing teacher).
- ID number – Setting an ID number provides a way of identifying the activity or resource for purposes such as grade calculation or custom reporting. Otherwise the field may be left blank. For gradable activities, the ID number can also be set in the gradebook, though it can only be edited on the activity settings page.
- Group mode – The group mode defined at course level is the default mode for all activities within the course. Each activity that supports groups can also define its own group mode, though if the group mode is forced at course level, the group mode setting for each activity is ignored. This setting has 3 options:
- No groups
- Separate groups – Each group member can only see their own group, others are invisible
- Visible groups – Each group member works in their own group, but can also see other groups
Restrict access
The restrict access feature enables teachers to restrict the availability of any activity according to certain conditions such as dates, grade obtained, group, user profile field, time spent on a different activity, or activity completion. A complex logic can be used with nested restrictions. To know more, explore our detailed guide on access restriction.
Alternatively, an activity can be hidden from students until they are ready to be used.

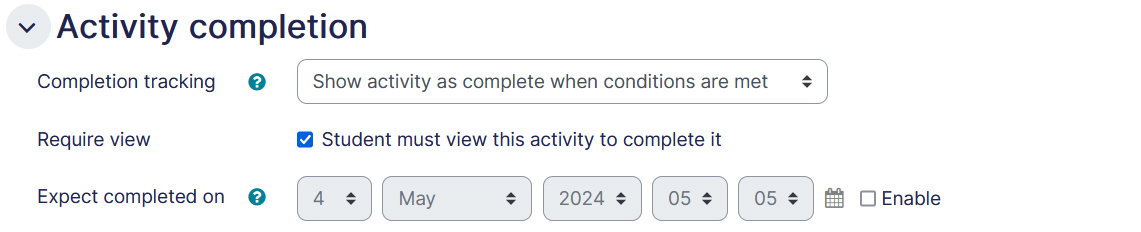
Activity Completion
Activity completion allows you to set completion criteria which basically decides when to consider the activity is completed. The following options are available:
- Students can manually mark the activity completed, here you allow students to make this decision.
- Activity is considered complete when certain conditions are fulfilled, where one or more conditions can be added.
- A date of expected completion of the activity
Competencies
Allows you to link competency to the activity. To know more, explore our guide on Competencies.
Creating/Editing the Custom Certificate #
Once a Custom Certificate activity is added to the course, the next step is to create your own Custom Certificate. The below steps are the same for editing an already created certificate activity.
To create a Custom Certificate:
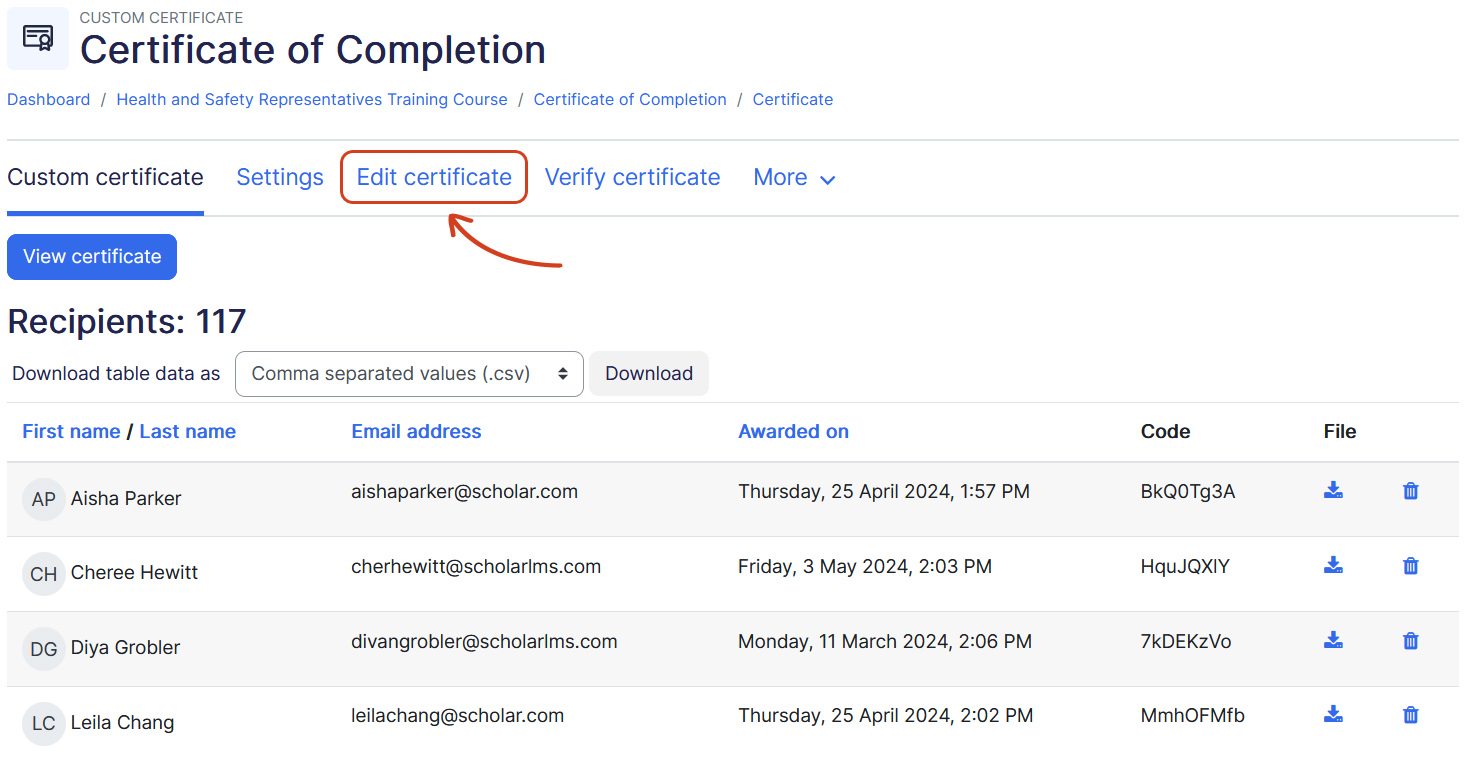
Step 1: Click on the ‘Edit Certificate’ link on the top navigation which takes to a new page where you can start creating the certificate.
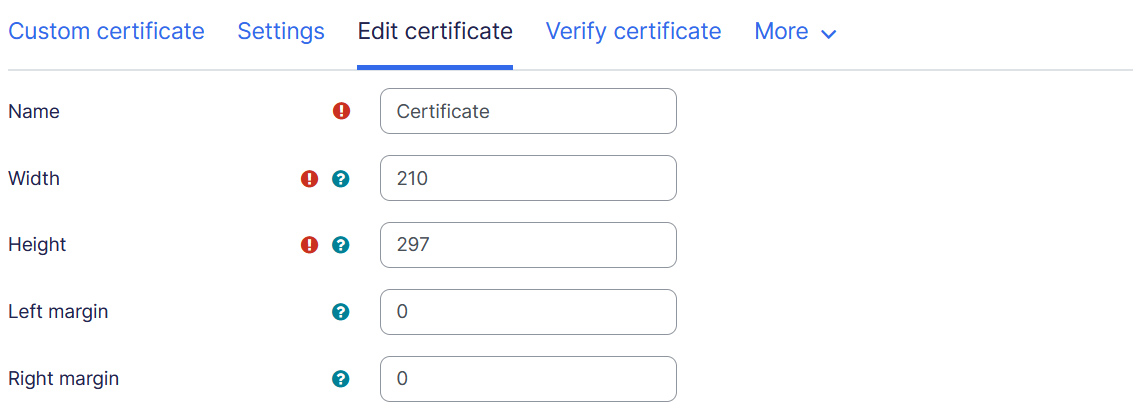
Step 2: Add certificate name, dimensions (in mm) and left/right margins (in mm) of the certificate. Additionally, it’s recommended that you input the width and height of the certificate’s background image for the Width and Height fields (in mm).
Step 3: Next, you can add elements of the certificate. The below screen shows some of the basic elements. Jump to the bottom of this article to understand how to add an element and its properties.
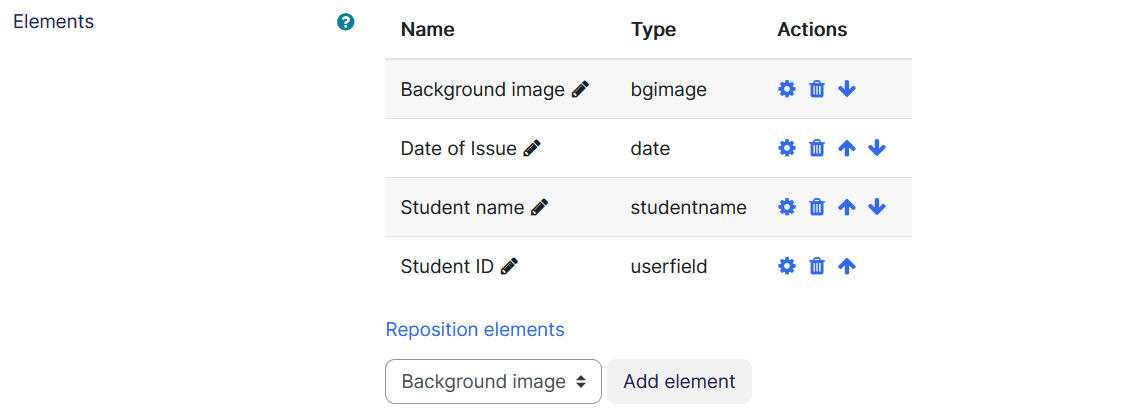
Step 4: You can click on ‘Reposition elements’ which takes you to a new page where you can position an element (by drag and drop) that you have added so far.
Step 5: Once the elements are added and positioned, you can save changes and preview the certificate.
Adding an element
To add an element, choose the element type from the dropdown and click on ‘Add element’ button.
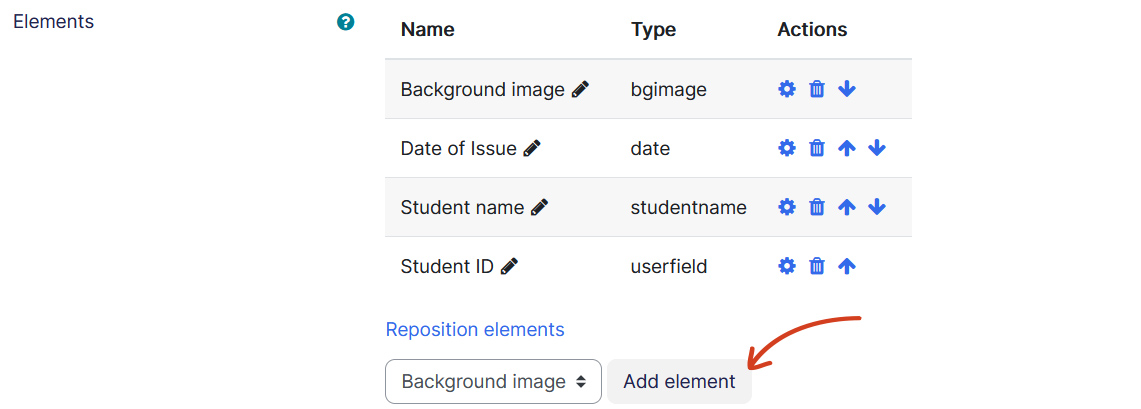
Types of elements
The Custom Certificate activity offers numerous types of elements that can be used to build a perfect certificate for your course/programs. All the elements can be majorly categorized in two categories, which are:
a) Dynamic elements – These elements pull information dynamically from your LMS site. For example, the ‘Student name’ element will pull Student’s name from the site.
b) Static elements – Unlike dynamic elements these elements have fixed value. For example, a ‘Text’ element will have the same information in every awarded certificate.
Below we will share a brief explanation of all the available element types.
- Background image – As the name suggests it’s the most basic element of the certificate, and must be added first, it’s static in nature. You can add JPG/PNG as the background image. To minimize the effort, all the static elements of the certificate should be saved as an image for background image. Keep a note, the dimension of this image should match the width and height defined in Step 2 above.
- Border – Allows you put a solid background around the certificate. You can choose the color and width of the border.
- Category name – Pulls the Category name this course belongs to.
- Code – Each generated certificate generates a unique code which can be added to the certificate with this element.
- Course field – Allows you to pull course’s fields like course ID, course description, etc.
- Course name – Pulls course name.
- Date – Allows you to pull some landmark dates of the course. The dates could be:
- Issued date of the certificate
- Course completion date
- Enrollment start/end date
- Course start/end date
- Or any activity’s completion date
- Date range – This element adds a date range. The element is specially used in scenarios where you need to mention a range of date like the range of date this course was taken.
- Digital Signature – Allows you put a digital (.crt) signature.
- Expiry date – Allows you add an expiry date of the certificate. The expiry date could be a fixed date, or a dynamic date. If a dynamic date is chosen, you can further choose duration after, and until how many days/months/years this certificate is considered valid.
- Grade – Allows you to add grade of the course.
- Grade item name – Adds graded item’s name.
- Image – Allows you to add an image in the certificate. It’s a static element.
- QR code – Generates a QR code of the certificate.
- Student name – Adds student’s name in the certificate.
- Teacher name – Adds course’s teacher name in the certificate.
- Text – Allows you to add a static text in the certificate.
- User field – Allows you to pull a user’s profile field.
- User picture – Pulls user’s picture in the certificate.
When previewing a certificate, the dynamic fields such as the user’s name, profile fields, and dates are populated with the information of the previewing user, and the dates are set to the current date.
Certificate Templates #
Certificate templates page allows you to build certificates and save them as templates which can be further pulled in any course. This feature is specifically useful if your courses/programs follow a specific certificate format.
The Certificate templates can be accessed from any Custom Certificate activity’s page via ‘Manage templates’ link located at the bottom of the page.
A Certificate Template can be created with the exact steps explained above. Once created, a template can be pulled in a Custom Certificate from the bottom of the page.