The Scheduler activity helps you in scheduling appointments with your students. Teachers specify time slots for meetings, students then Book one or more of them. Teachers in turn can record the outcome of the meeting – and optionally a grade – within the Scheduler. Group scheduling is supported; that is, each time slot can accommodate several students, and optionally it is possible to schedule appointments for entire groups at the same time.
Scheduler activity features:
- Allows you to add single or repeated appointment slots.
- Slots can be available for a single student or a group of students.
- Slots can be graded for a single student or a group of students.
- Send email reminders to teachers and students once a slot has been booked or cancelled.
- You can limit the number of slots per student in the entire Scheduler activity, or at a time.
Adding a Scheduler Activity #
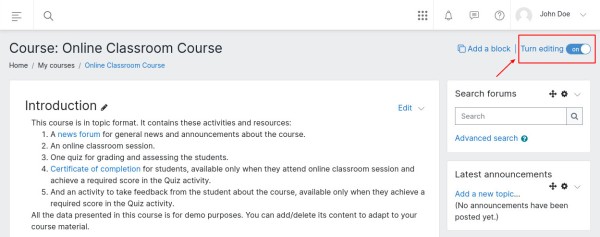
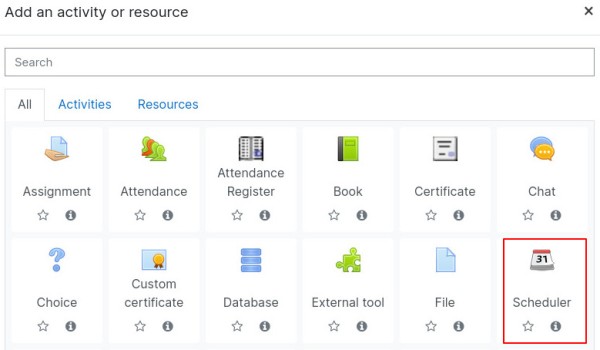
To add a Scheduler activity, go to the desired course where you click on “Add Activity” and choose ‘Scheduler’ from the activity chooser window. Do not forget to “Turn editing on” if the course is not in editing mode. Once added, you will be redirected to the settings page.
Scheduler Settings #
This section explores the settings for the Scheduler activity once you have added it to your course.
General #
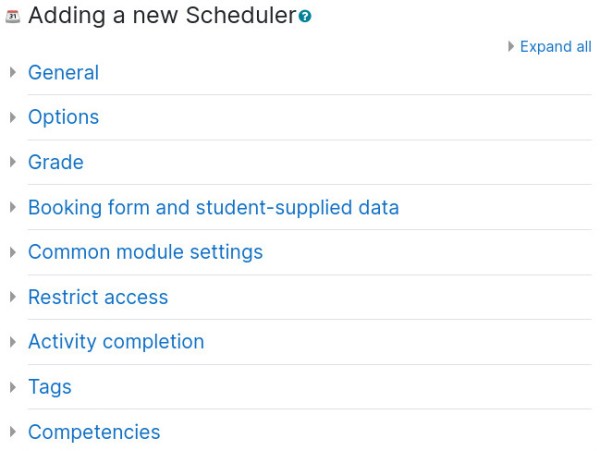
- Name – This is a mandatory field. Put in the name as you desire for the Scheduler activity you are creating.
- Introduction – The description or more information about the Scheduler activity could be put in here.
Options #
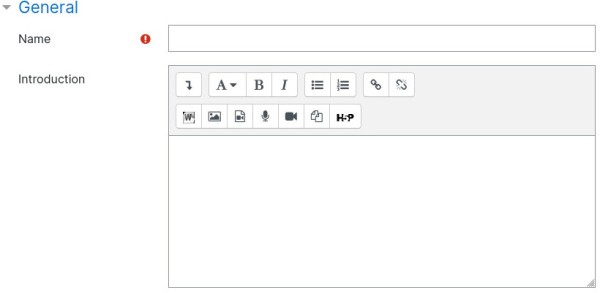
- Role name of the teacher – The label for the role who attends students. This is not necessarily a ‘teacher’.
- Mode – Choose how the number of appointments should be counted and limited:
- “n appointments in this Scheduler” – The student can only Book a fixed number of appointments in this activity. Even if the teacher marks them as ‘seen’, they will not be allowed to Book further meetings. The only way to reset the ability of a student to Book is to delete the old ‘seen’ appointments.
- “n appointments at a time” – The student can Book a fixed number of appointments. Once the meeting is over and the teacher has marked the student as ‘seen’, the student can Book further appointments. However the student is limited to n ‘open’ (unseen) slots at any given time.
- Booking in groups – Allows students to Book a slot for all members of their group. (Note that this is separate from the ‘group’ mode setting, which controls the slots a student can see.)
- Guard time – A guard time prevents students from changing their booking shortly before the appointment. If the guard time is enabled and set to, for example, 2 hours, then students will be unable to Book a slot that starts in less than 2 hours time from now, and they will be unable to drop an appointment if it starts in less than 2 hours.
- Default slot duration – The default length (in minutes) for appointment slots that you set up in this Scheduler activity. You can change this while creating appointment slots.
- Notifications – When this option is enabled, teachers and students will receive notifications when appointments are booked or cancelled.
- Use notes for appointments – Allows teachers and students to put notes about an appointment. Here you can select their visibility as well.
Grade #
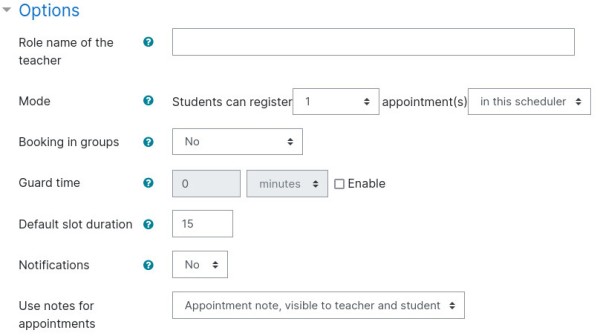
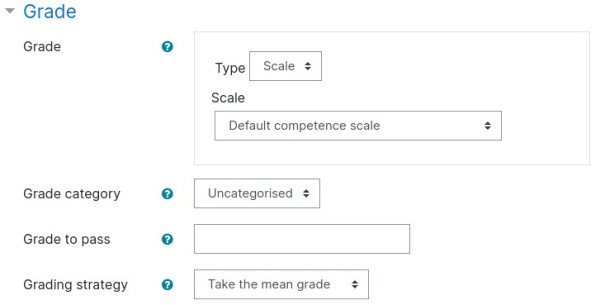
Allows you to set up grades for an appointment slot.
- Grading type – Select the type of grading used for this activity. If ‘scale’ is chosen, you can then choose the scale from the dropdown menu. If using ‘point’ grading, you can then enter the maximum grade available for this activity.
- Grading category – This setting controls the category in which this activity’s grades are placed in the gradebook.
- Grade to pass – This setting determines the minimum grades required to pass. The value is used in activity and course completion, and in the gradebook, where pass grades are highlighted in green and fail grades in red.
- Grading strategy – In a Scheduler where students can have several appointments, select how grades are aggregated. The gradebook can show either ‘the mean grade’ or ‘the maximum grade’ that the student has achieved.
Booking Form and Student-supplied Data #
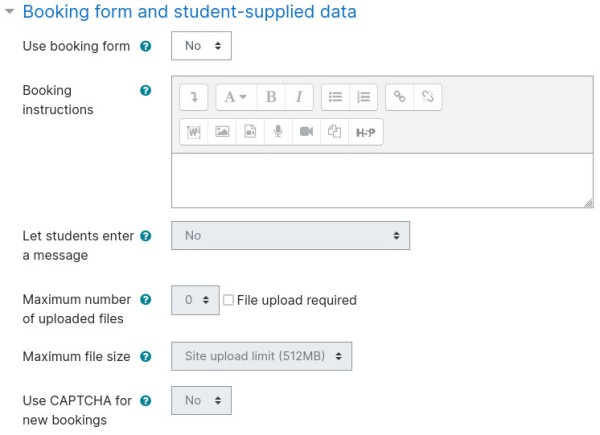
- Use booking form – If enabled, students see a separate booking form before they can Book a slot. The booking form may require them to enter data, upload files, or solve a captcha; see options below.
- Booking instructions – Enter instructions to the students, it will be displayed to students before they make a booking. It can, for example, instruct students how to fill-out the optional message field or which files to upload.
- Let students enter a message – If enabled, the booking form will contain a text box in which students can enter a message. Use the ‘booking instructions’ above to instruct students what information they should supply.
- Maximum number of uploaded files – The maximum number of files that a student can upload in the booking form. File upload is optional unless the ‘File upload required’ box is ticked. If set to 0, students will not see a file upload box.
- Maximum file size – Define the maximum file size that can be uploaded. This limit applies per file.
- Use CAPTCHA for new bookings – If enabled, students will need to solve a CAPTCHA security question before making a new booking. Use this setting if you suspect that students use automated programs to snap up available slots. No captcha will be displayed if the student edits an existing booking.
Common Module Settings (Optional) #
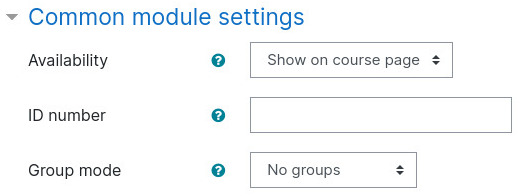
- Availability – If the availability is set to ‘Show on course page’, the activity or resource is available to students (subject to any access restrictions which may be set). If the availability is set to ‘Hide from students’, the activity or resource is only available to users with permission to view hidden activities (by default, users with the role of teacher or non-editing teacher).
- ID number – Setting an ID number provides a way of identifying the activity or resource for purposes such as grade calculation or custom reporting. Otherwise the field may be left blank. For gradable activities, the ID number can also be set in the gradebook, though it can only be edited on the activity settings page.
- Group mode – The group mode defined at course level is the default mode for all activities within the course. Each activity that supports groups can also define its own group mode, though if the group mode is forced at course level, the group mode setting for each activity is ignored. This setting has 3 options:
- No groups
- Separate groups – Each group member can only see their own group, others are invisible
- Visible groups – Each group member works in their own group, but can also see other groups
Restrict Access #
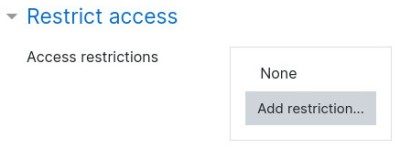
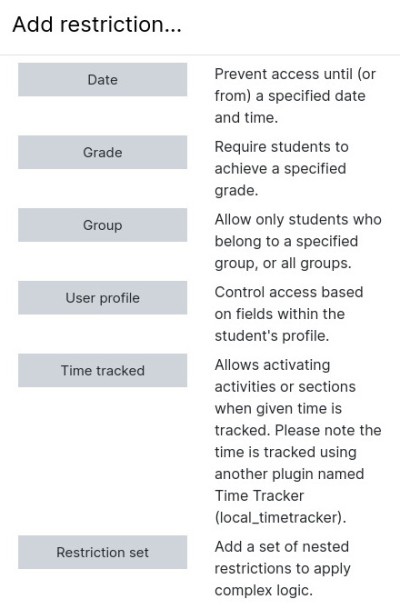
The restrict access feature enables teachers to restrict the availability of any activity according to certain conditions such as dates, grade obtained, group, user profile field, time spent on a different activity, or activity completion. A complex logic can be used with nested restrictions. To know more, explore our detailed guide on access restriction.
Alternatively, an activity can be hidden from students until they are ready to be used.
Activity Completion #
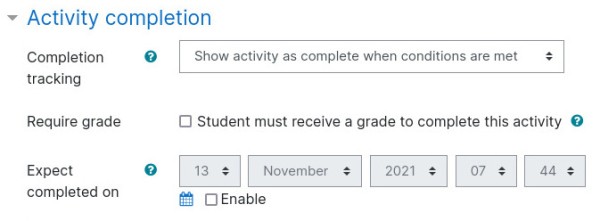
Activity completion allows you to set completion criteria which basically decides when to consider the activity is completed. The following options are available:
- Students can manually mark the activity completed, here you allow students to make this decision.
- Activity is considered complete when certain conditions are fulfilled, where one or more conditions can be added.
- Student must receive a grade to complete the activity
- A date of expected completion of the activity
Competencies #
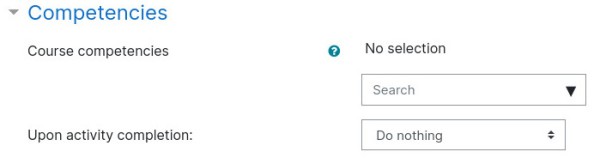
Allows you to link competency to the activity. To know more, explore our guide on Competencies.
Appointments Page – Overview #
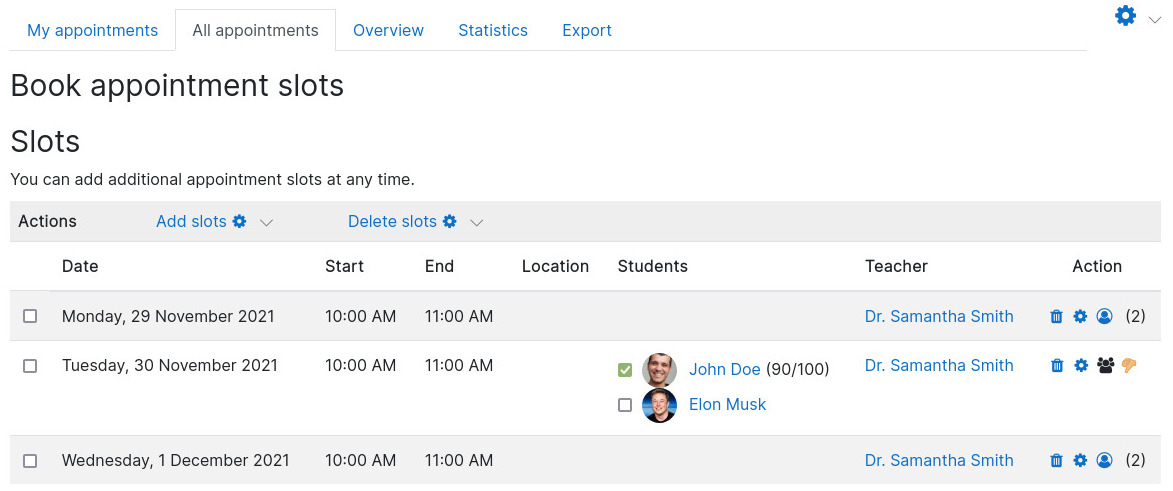
Once a Scheduler activity is added, the page redirects to the Appointments page. In this section we will explore this page with various other options it offers. Refer the pointers attached to the below screenshot.
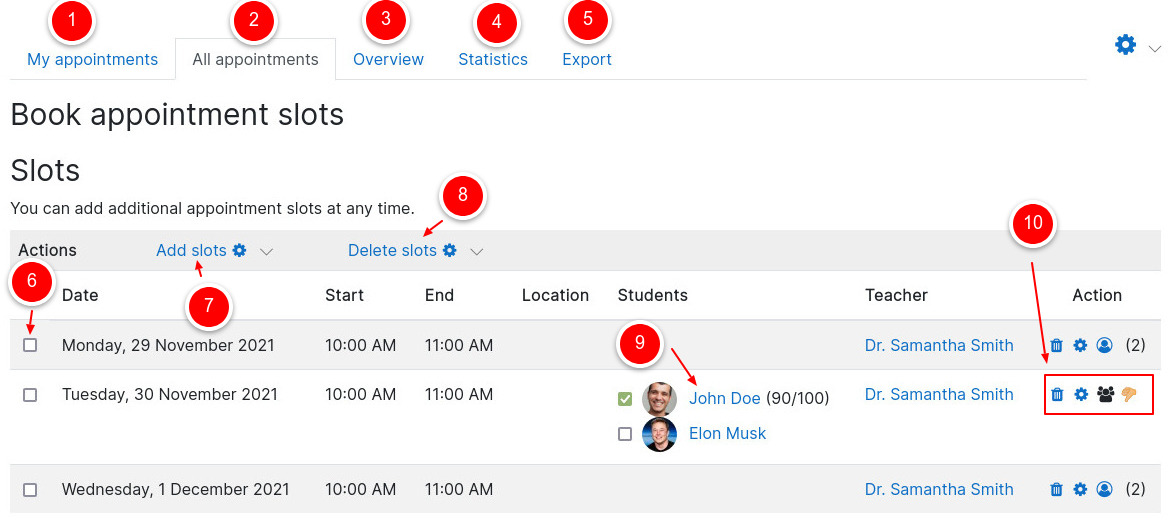
#1. My appointments – Applicable for ‘Teachers’, this page lists all the appointments of a teacher.
#2. All appointments – This tab lists all the available appointments. Admin can add/delete or perform various actions from this tab.
#3. Overview – Allows admin to filter all the available slots, available at course or site level.
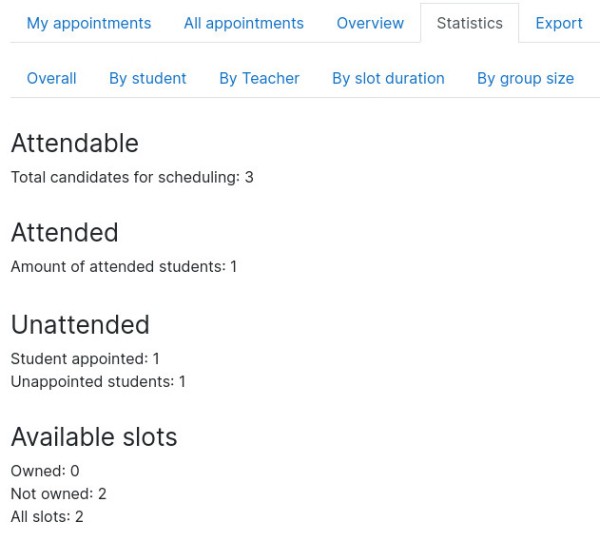
#4. Statistics – The tab shows a brief report of all the available slots in this Scheduler activity, which can be further filtered by student, teacher, slot’s duration and group size.
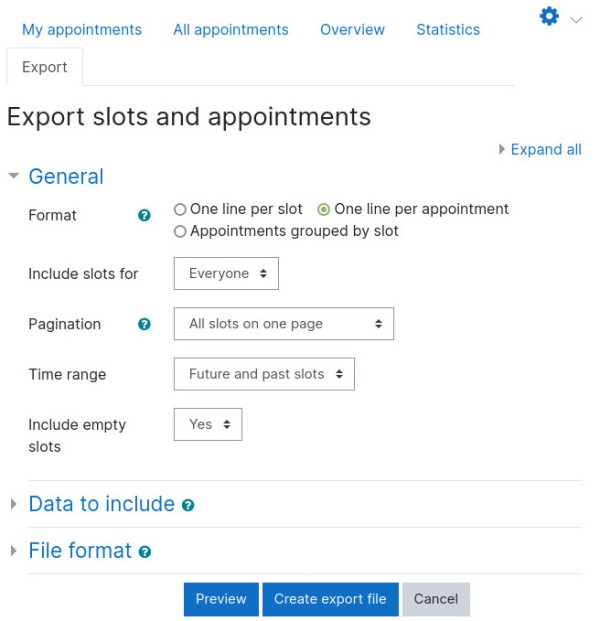
#5. Export tab – Allows you to export Scheduler’s report. You can choose what data and in what format should it be exported.
#6. Slot selector – Allows you to select records for action.
#7. Add slots – Allows you to add single or repeated slots
#8. Delete slots – Allows you to delete selected slots, all slots, unused slots, my unused slots, and all my slots.
#9. Booked slot – Take action on a booked appointment, you can make it seen, grade it, or add notes.
#10. Actions – Take action on a booking slot. The actions are:
- Delete slot
- Edit slot
- Change group mode
- Revoke slot
Adding Appointment Slots #
Once a Scheduler activity is added, the next task is to create appointment slots for students.
Make sure you have at least one user with a teacher role, without a teacher you won’t be able to create appointment slots.
Follow below steps for adding appointment slots:
Step 1 – Add slots #
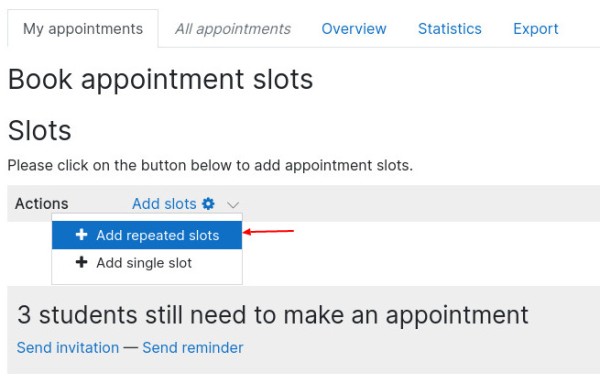
Go to Scheduler activity, and click the ‘Add slots’ link. You can either add a single slot, or repeat slots.
Step 2 – Create slots #
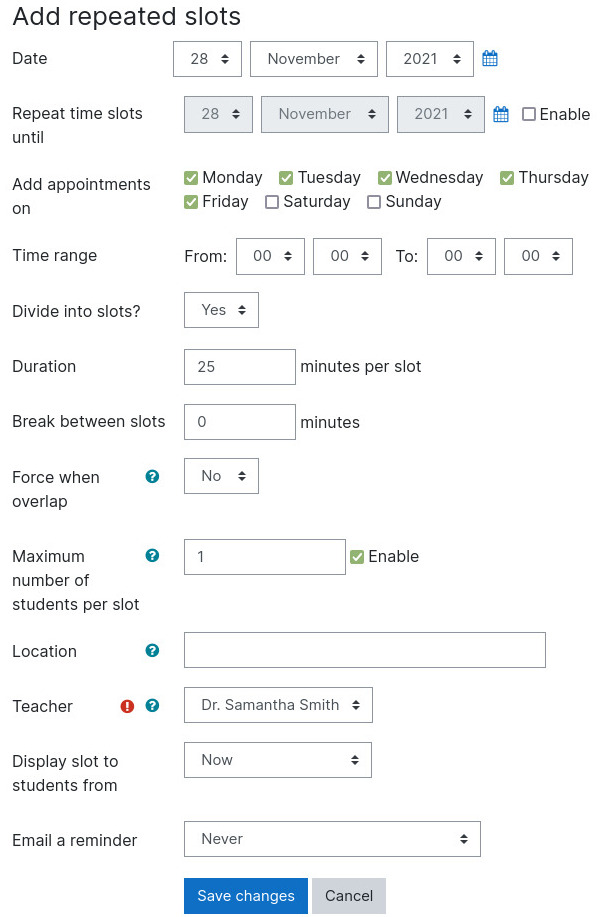
‘Add repeated slots’ will open a new page which asks details on how you would like to add slots. Once added, the slots will be listed under the ‘All Appointments’ tab. Let’s explore the options for adding repeated slots, the options for ‘Add single slot’ are almost similar.
- Date – Date from when the slots will start adding
- Repeat time slots until – The end date until when the slots will be added
- Add appointments on – Choose the week days these slots should be created
- Time range – Choose a range of time in which these slots should be created.
- Divide into slots – If enabled, you will be able to choose Duration and Break between slots.
- Duration – Input duration (in minutes) of a slot
- Break between slots – Input break (in minutes) between two slots
- Force when overlap – This setting determines how new slots will be handled if they overlap with other, already existing slots. If enabled, the overlapping existing slot will be deleted and the new slot created. If disabled, the overlapping existing slot will be kept and a new slot will ‘not be’ created.
- Max. number of students per slot – You can set a limit on the number of students that can apply for a given slot. Setting a limit of 1 (default) will mean that the slot is exclusive to a single student. Setting a limit of, e.g., 3 will mean that up to three students can Book into the slot. If disabled, any number of students can Book the slot; it will never be considered “full”.
- Location – If applicable, specify a location for the slot.
- Teacher – Choose a teacher for this slot.
- Display slot to students from – Allows you to select from when a slot be visible to students. E.g. ‘1 week before slot’ will display 8th December slot from 1st December onward.
- Email a reminder – Choose when the appointment’s reminder should be sent.
Grade or Mark Seen a Booked Slot #
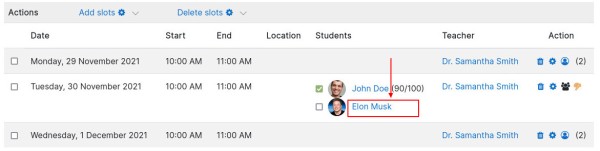
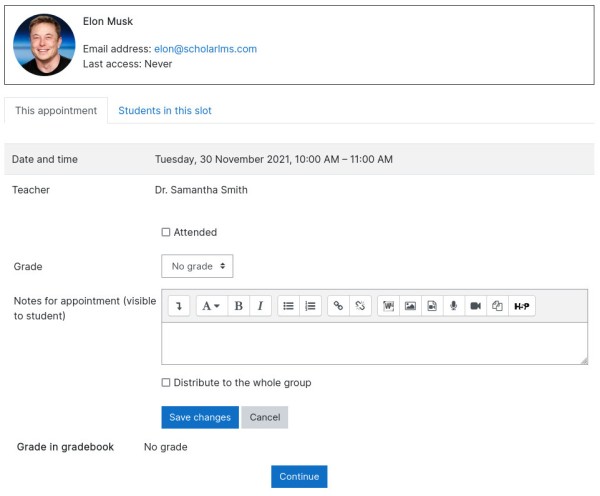
To grade, add notes or mark a booked slot as seen, click on the booked slot, which takes you tothe booked slot page.