
ScholarLMS uses BigBlueButton (BBB) as it’s Online Classroom feature. BBB offers one of the richest classroom experiences that you can imagine. Armed with tools such as a shared white-board, a continuous side-by-side chat room, audio and video feeds, ability to upload multiple presentations and various abilities to control and conduct the class, this is the next best thing to actually sitting in the same classroom.
Most of the academic community agrees that an Instructor-Led Training (ILT) classroom is one of the most effective places for students to learn, hence ScholarLMS’s Online Classroom activity comes handy for synchronous learning environments. In this article we are going to explore how to set up a virtual/Online Classroom seamlessly in your courses. If you have already set up an Online Classroom, you may explore the Online Classroom Video Tutorials.
Adding an Online Classroom Session #
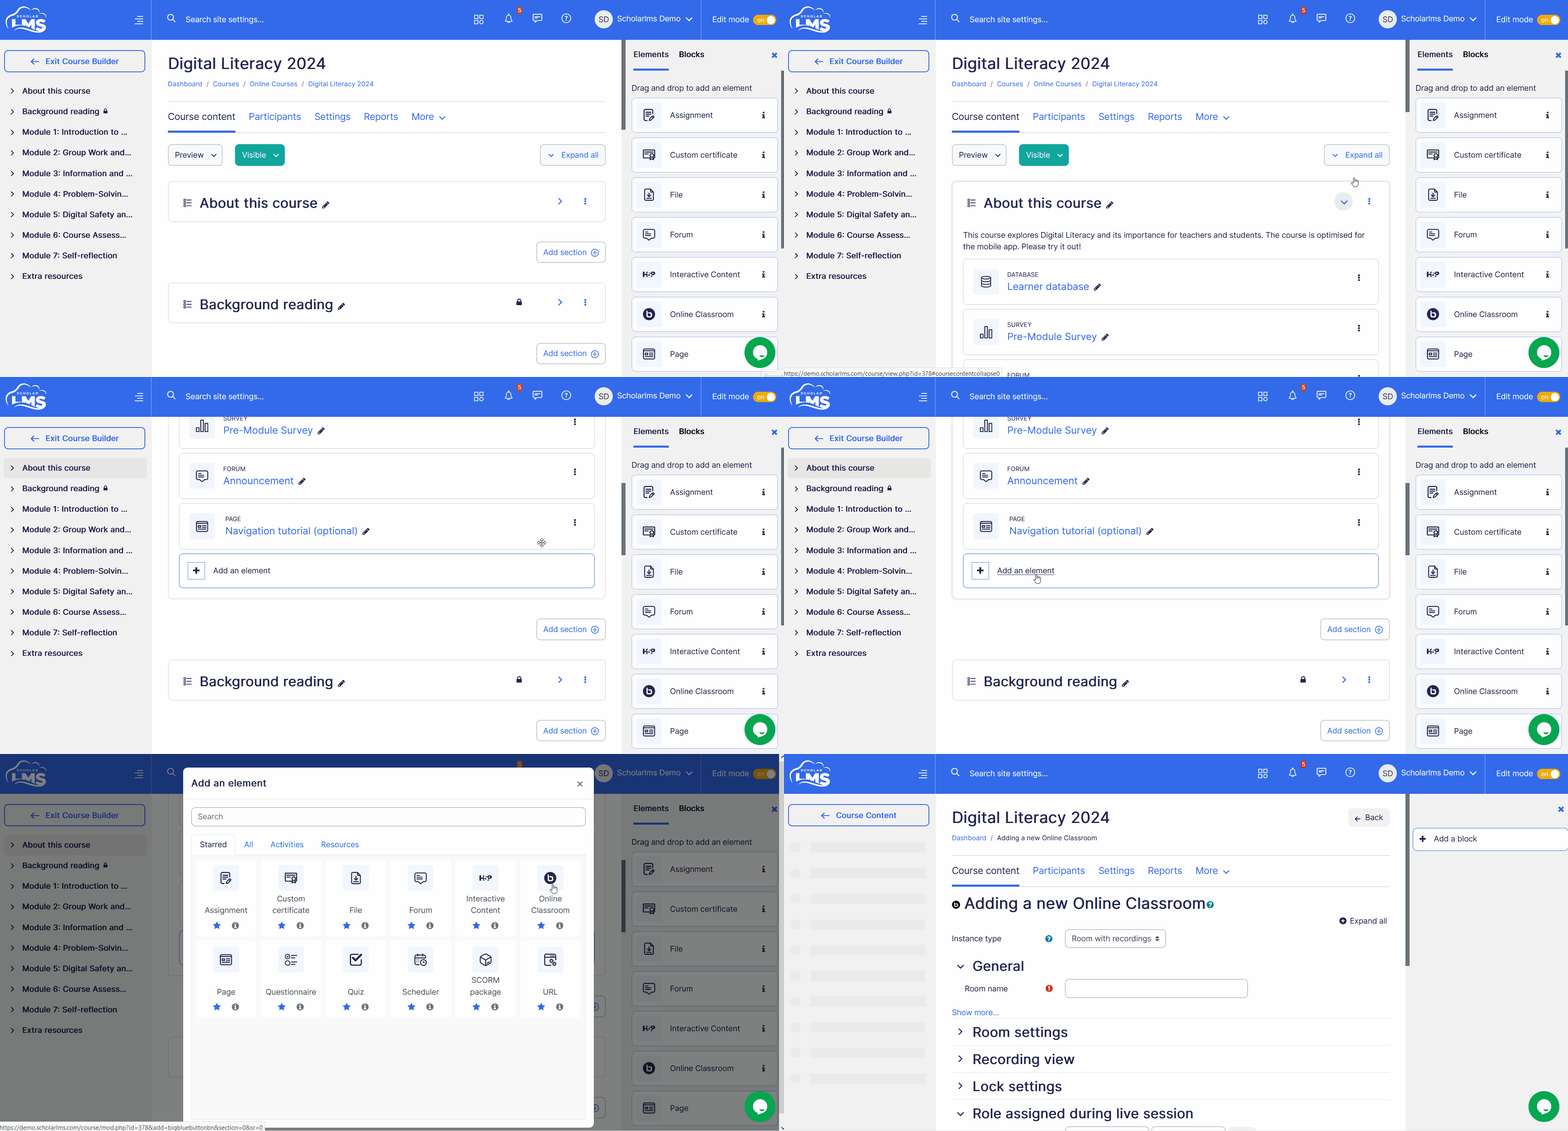
To add an Online Classroom session lesson:
- Navigate to the Courses page.
- Click on “Edit” under Actions for the desired course.
- This takes to Course Builder page. Ensure that the Edit mode is activated on the Course Builder page.

- Navigate to the Course Section, click the ‘Add an element’ button, which opens a pop up window, add Online Classroom.
Online Classroom’s settings #
One of the most important aspects of an Online Classroom session is its settings. How you want to use your Online Classroom totally depends upon the settings you will choose. In this section we will explain some important settings of this activity.
Instance type
In instance type you have three options, based on the ScholarLMS pricing plan, there could be limited options you see in the dropdown.
- Room with recordings – Choose this option if you want to show recordings on the classroom page. The recordings automatically get listed at the bottom of the classroom’s page.
- Room only – Only classroom sessions can be taken. It will not list recordings of this session even if the recordings are available.
- Recordings only – Lists all the recordings of the entire course, doesn’t matter if they belong to this session or not. Individual recordings from the list can be hidden from students though. This option is particularly helpful if there is a need to show recordings of the entire course.

General settings
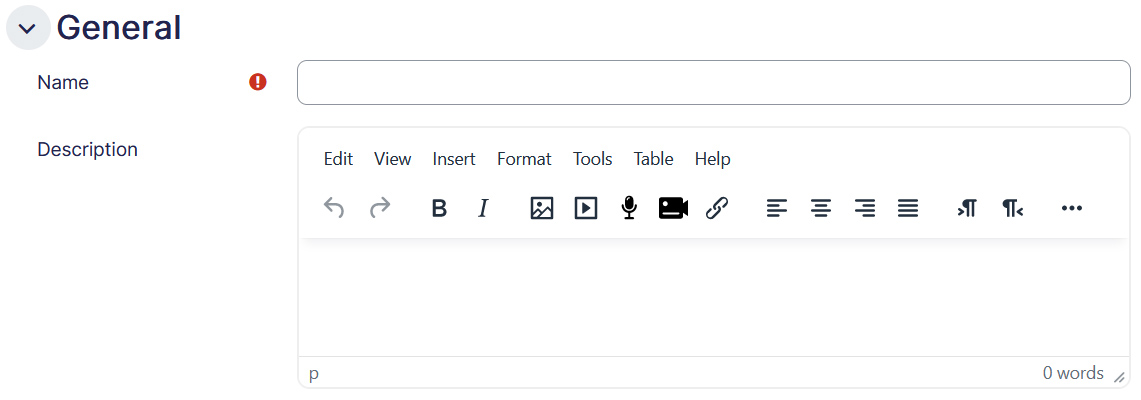
- Room name – Give a title/name to this classroom session.
- Description – In this box, you can give a meaningful description to the session. “Display description on course page” checkbox will enable the description to be displayed on the course page below the link to activity.
Activity/Room settings
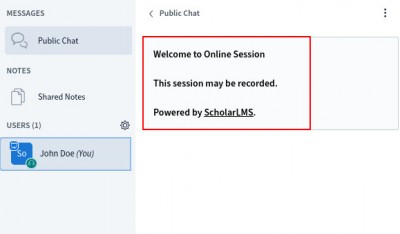
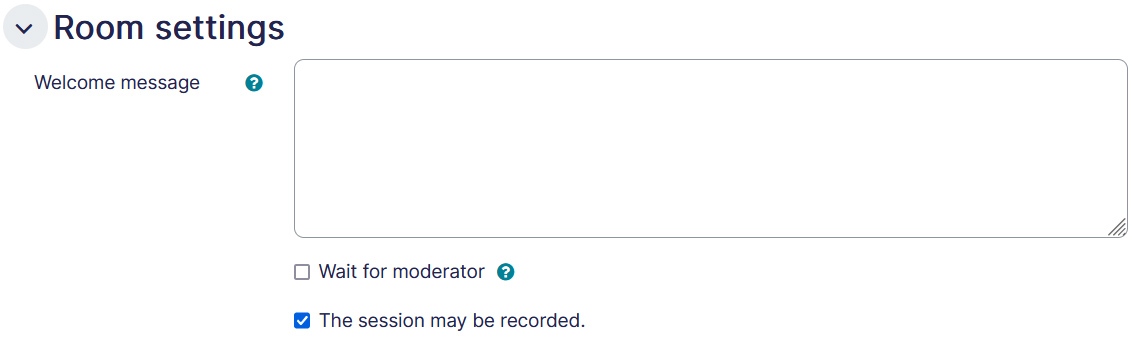
- Welcome message – This message is shown at the beginning of the Online Classroom session in the chat box.
- Wait for Moderator – If enabled, participants must wait until a moderator starts this session. Do not forget to assign a Moderator under Participants if this is enabled.
- Session can be recorded – Enable this option if you would like this session to be recorded.
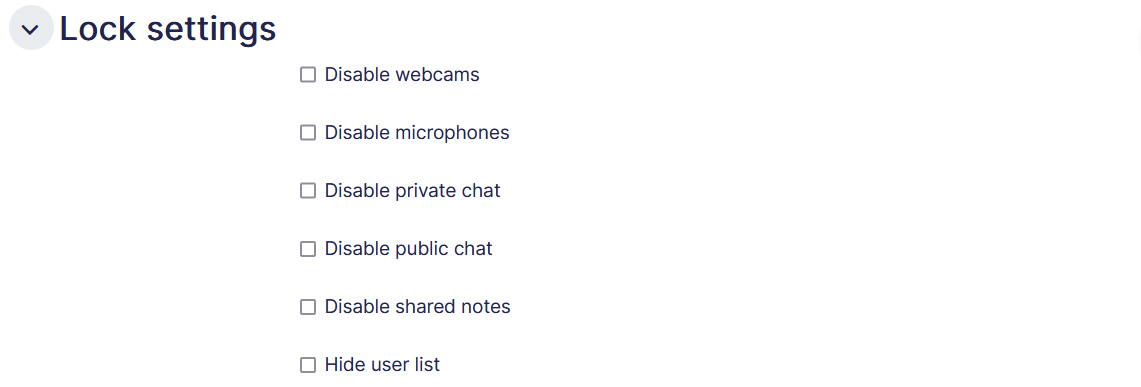
Lock settings
The lock settings tab allows you to disable certain features like webcam, microphone, etc from the chat room.
Role assigned during live session
This option allows you to add participants in the classroom session. By default all enrolled users of the course are added as viewers. You can also choose a specific user or an entire role as participants for the session. For instance if you select ‘student’ role from the dropdown, all the enrolled users of this course having ‘student’ role will automatically become participants.
You can further make a user/role as viewer or moderator of the classroom session.
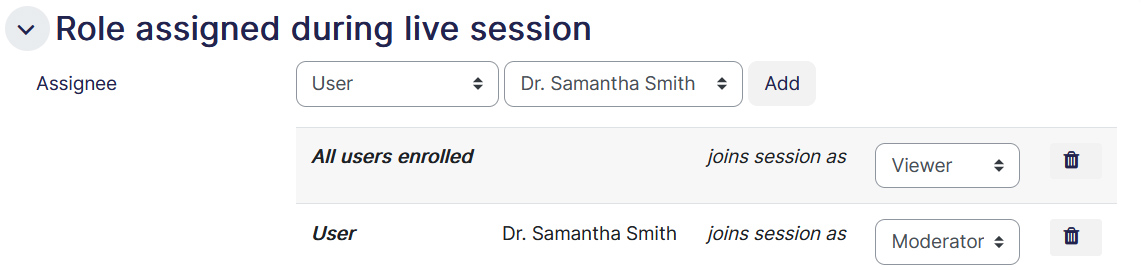
If you have enabled the ‘Wait for moderator’ option under Room settings, you must assign a moderator to the room.
Session timing
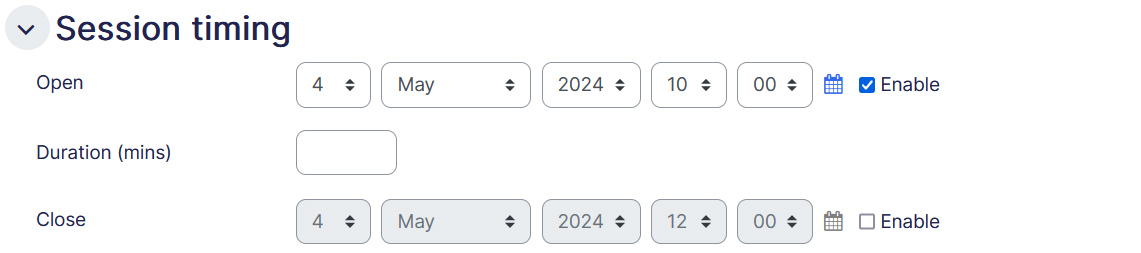
This option allows you to schedule the session by using Open, Duration and Close options.
- Without any “Open” and “Close” the session will always be open, and a moderator can start this session any day/time as they desire.
- With an “Open” date and time, the session cannot get started before the scheduled date and time.
- With an “Open” and “Close” date and time, the session can only be started after “Open” and before “Close” time.
- A running session is never terminated even if it passes over it’s schedule duration. Moderator must manually “End session” to terminate it.
Repeat session
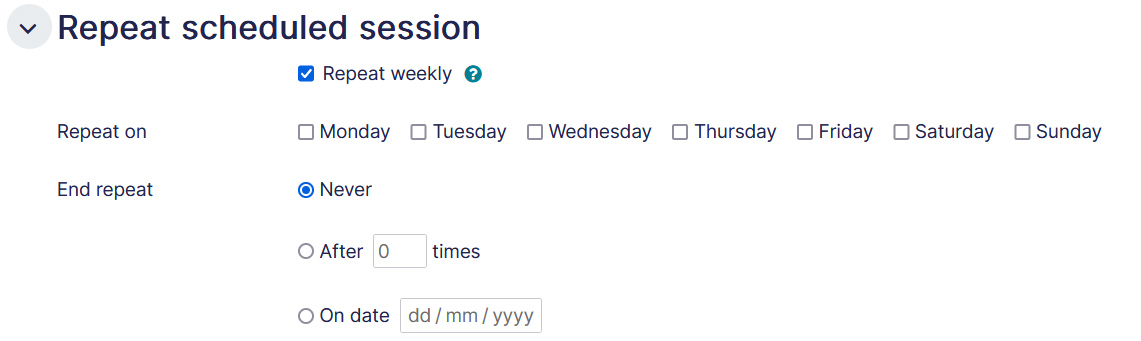
Allows you to repeat this session at the same day/time of the week. This setting applies to the sessions which have “Open” and “Close” date/time.
- Repeat weekly — Check this option to enable repeat session option.
- Repeat on — Check days of the week you would like to repeat this session. Select at least one option.
- End repeat
- Never — Will have no end date.
- After — Enter how many times the session should repeat. If you enter 10 times, the session will repeat 10 times for the chosen day and time.
- On date — Enter the last date the repeated session should end.
Common module settings
- Availability – If the availability is set to ‘Show on course page’, the activity or resource is available to students (subject to any access restrictions which may be set). If the availability is set to ‘Hide from students’, the activity or resource is only available to users with permission to view hidden activities (by default, users with the role of teacher or non-editing teacher).
- ID number – Setting an ID number provides a way of identifying the activity or resource for purposes such as grade calculation or custom reporting. Otherwise the field may be left blank. For gradable activities, the ID number can also be set in the gradebook, though it can only be edited on the activity settings page.
- Group mode – The group mode defined at course level is the default mode for all activities within the course. Each activity that supports groups can also define its own group mode, though if the group mode is forced at course level, the group mode setting for each activity is ignored. This setting has 3 options:
- No groups
- Separate groups – Each group member can only see their own group, others are invisible
- Visible groups – Each group member works in their own group, but can also see other groups
Restrict access
The restrict access feature enables teachers to restrict the availability of any activity according to certain conditions such as dates, grade obtained, group, user profile field, time spent on a different activity, or activity completion. A complex logic can be used with nested restrictions. To know more, explore our detailed guide on access restriction.
Alternatively, an activity can be hidden from students until they are ready to be used.

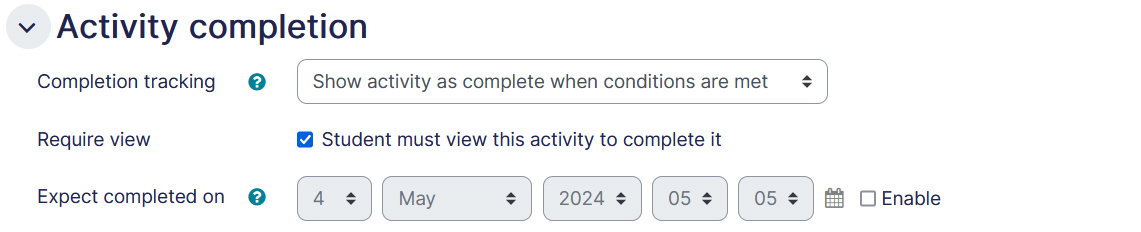
Activity Completion
Activity completion allows you to set completion criteria which basically decides when to consider the activity is completed. The following options are available:
- Students can manually mark the activity completed, here you allow students to make this decision.
- Activity is considered complete when certain conditions are fulfilled, where one or more conditions can be added.
- A date of expected completion of the activity
Competencies
Allows you to link competency to the activity. To know more, explore our guide on Competencies.