
Introduction #
ScholarLMS allows seamless integration between your ScholarLMS account and WordPress website using a dedicated WordPress plugin.
This integration enables Single Sign-On (SSO), allowing users logged into your WordPress site to access the LMS without needing to log in again.

How SSO Works
- If a user logs into WordPress and does not exist in the LMS, a corresponding account will be automatically created in the LMS.
- However, logging into the LMS directly will not create a WordPress account.
- If a user is already logged into WordPress, they will also be automatically logged into LMS account, ensuring a seamless, unified login experience.
Configuration on ScholarLMS Site #
Adding WordPress SSO Authentication
Step 1: Step 1: Log in to your ScholarLMS admin account
Step 2. Navigate to Settings → Advanced Settings → Plugins → Authentication → Manage Authentication
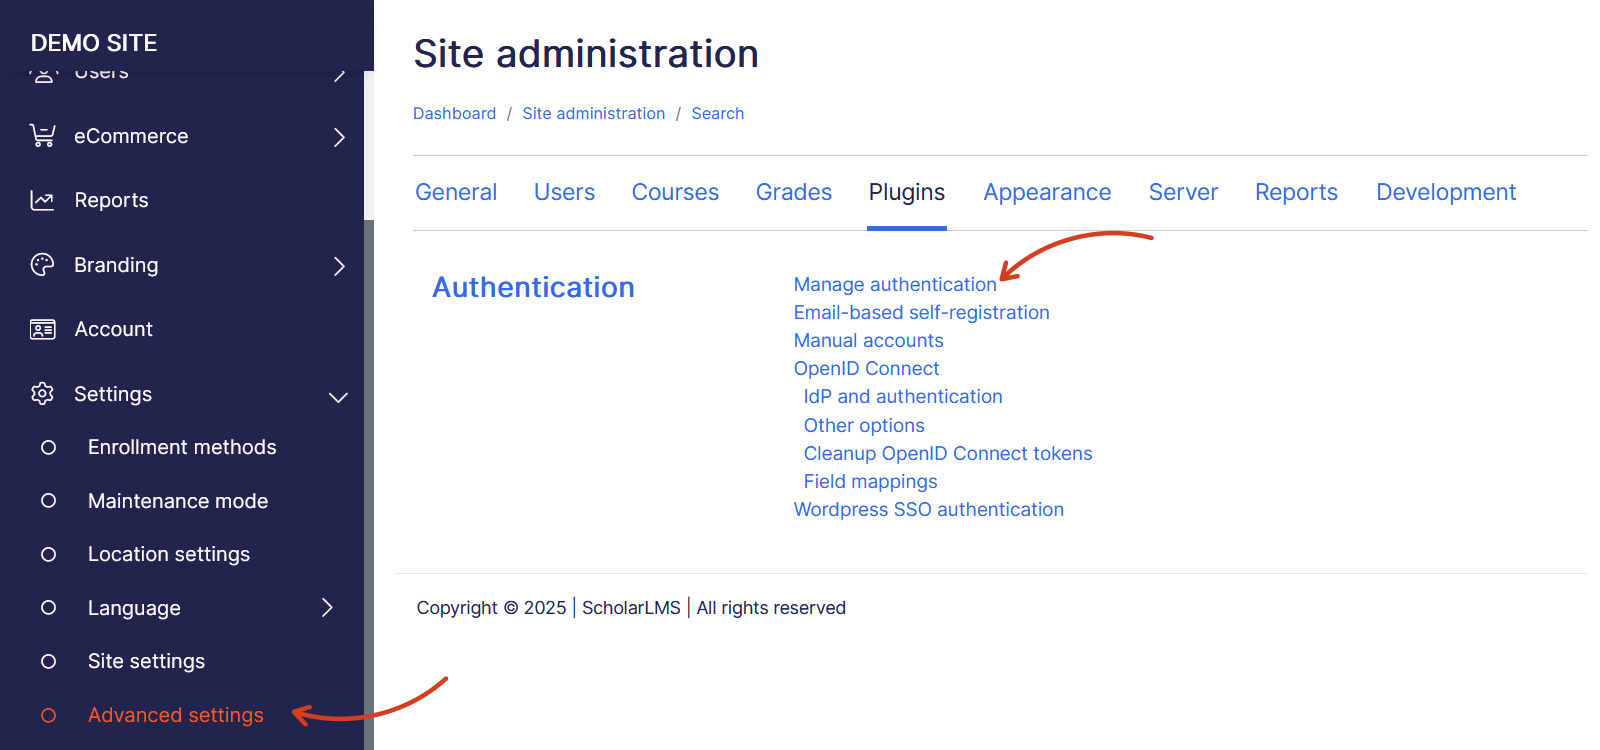
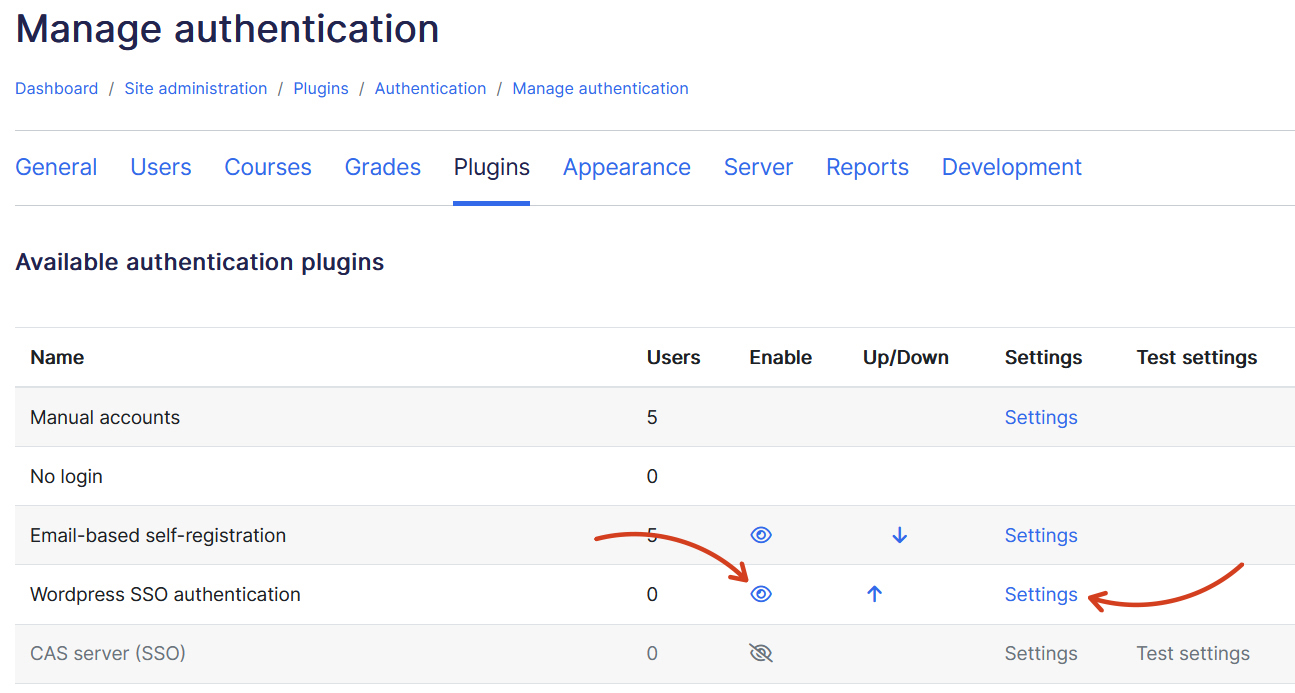
Step 3: On the Manage Authentication page, find WordPress SSO authentication
- Click the crossed eye icon to enable it.
- Then click Settings. WordPress SSO Authentication.
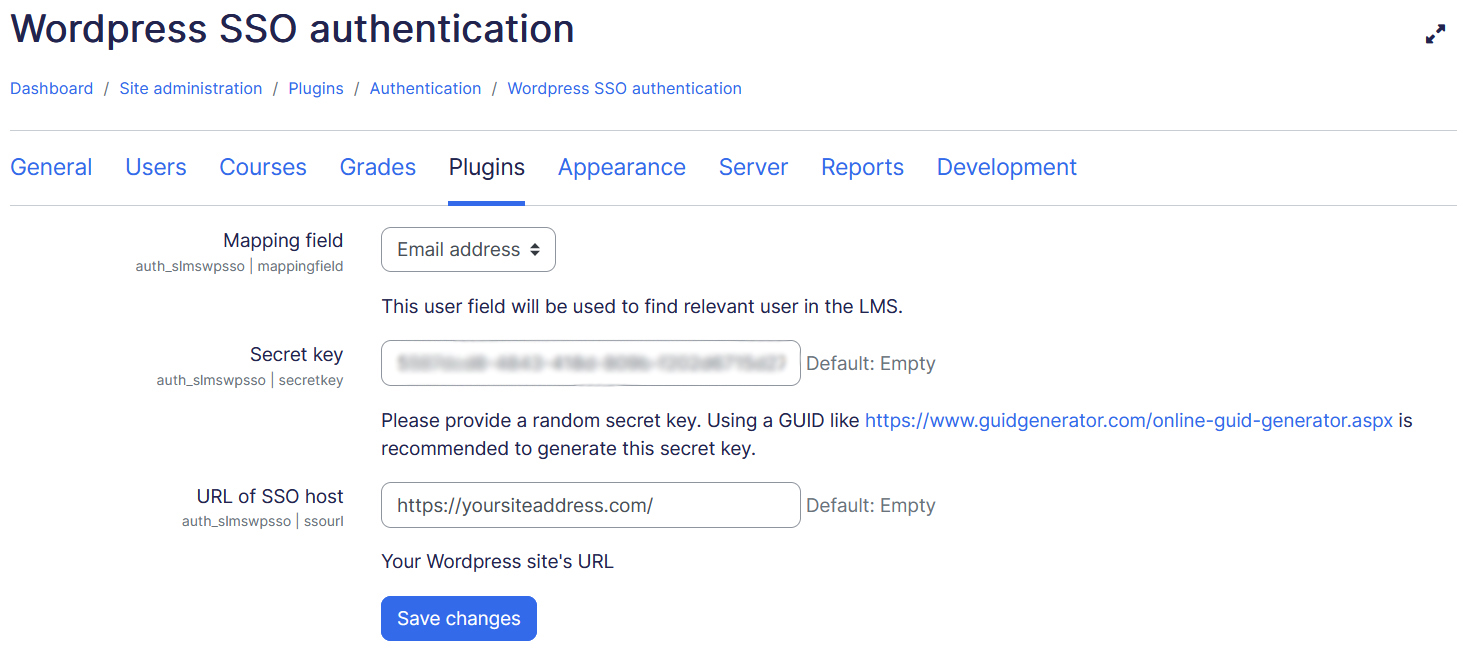
Step 4: On the Settings page:
- Generate a Secret Key using this GUID generator
- Enter your WordPress site URL
- Click Save Changes
Note: Make sure to copy this Secret key, it will be used in WordPress Plugin settings
Setting up WordPress SSO External Services
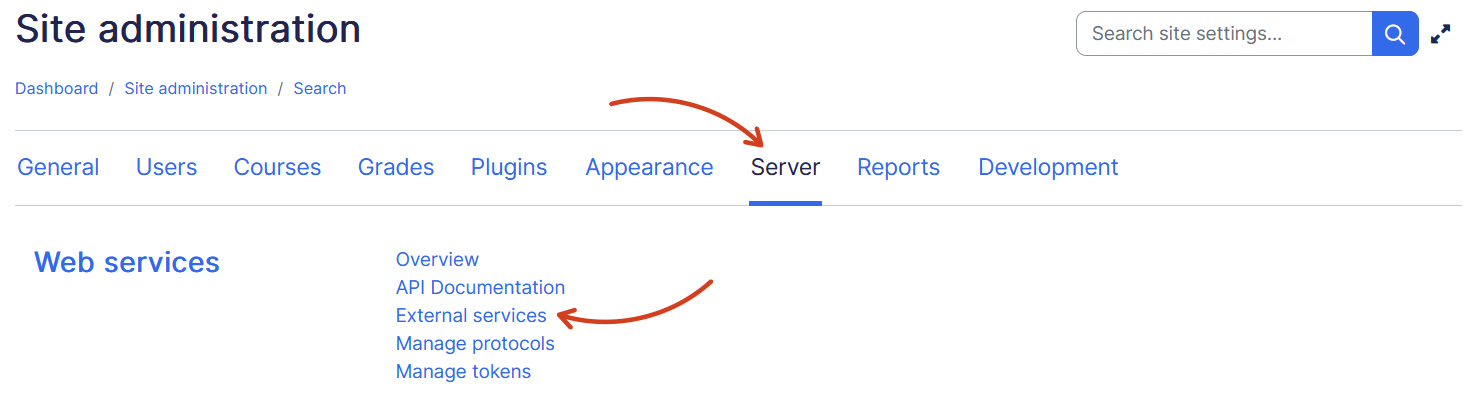
Step 1: Now again from left navigation, navigate to Settings → Advanced settings → Server → Web services → External services
Step 2: Scroll to the WordPress SSO service → Click Authorized Users
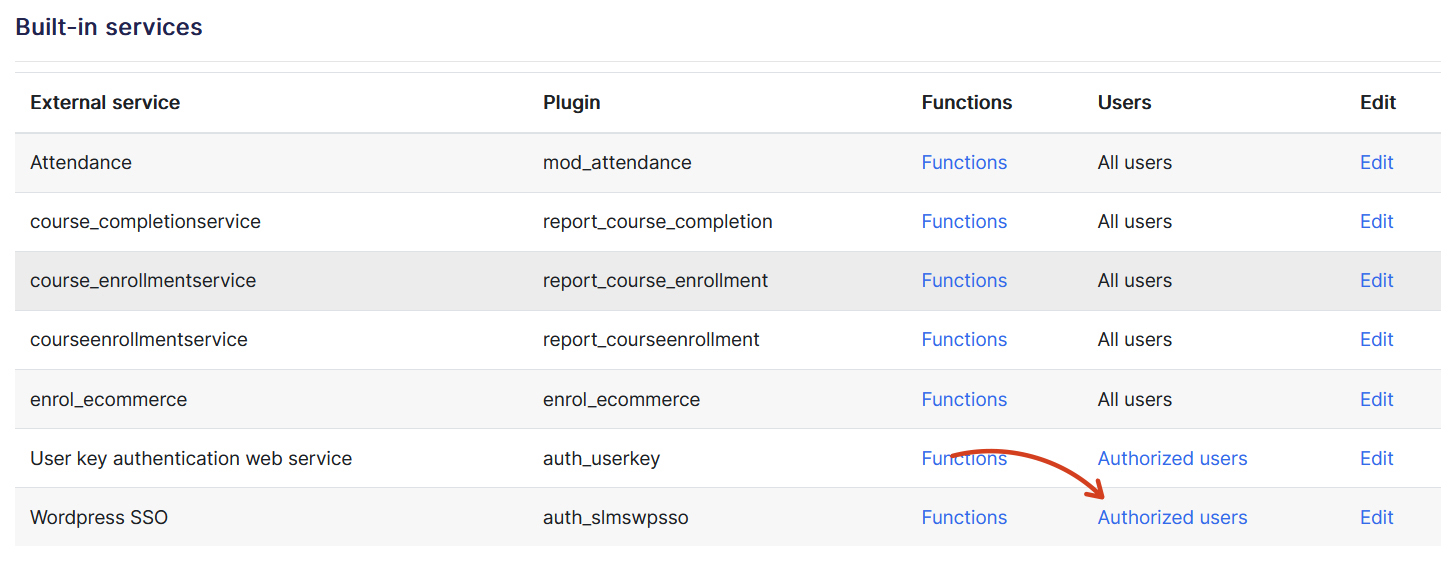
- Add your LMS admin user from the right panel to the list of authorized users
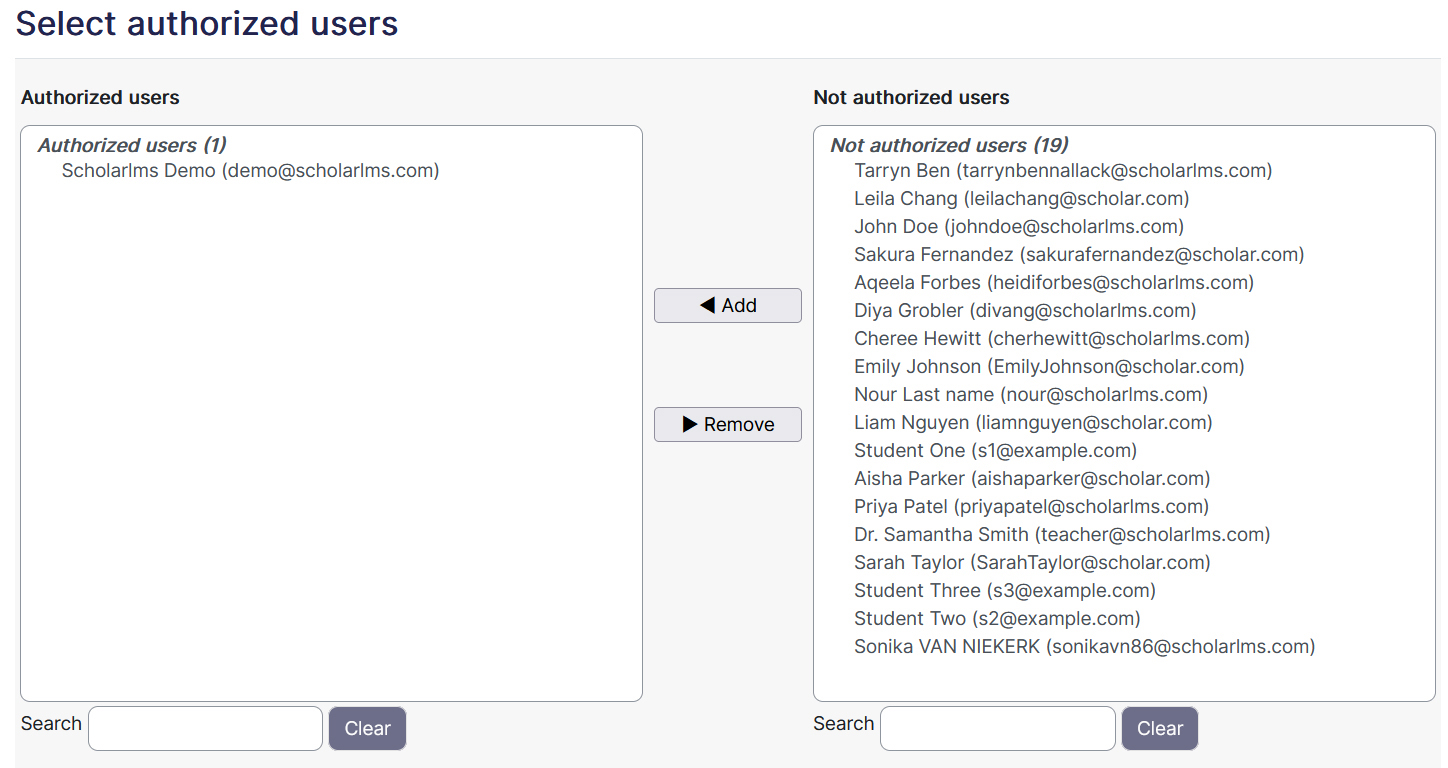
Creating a Web Service Token
Step 1: Navigate to Settings → Advanced settings → Server → Web services → Manage tokens, and then click on “Create token” button.
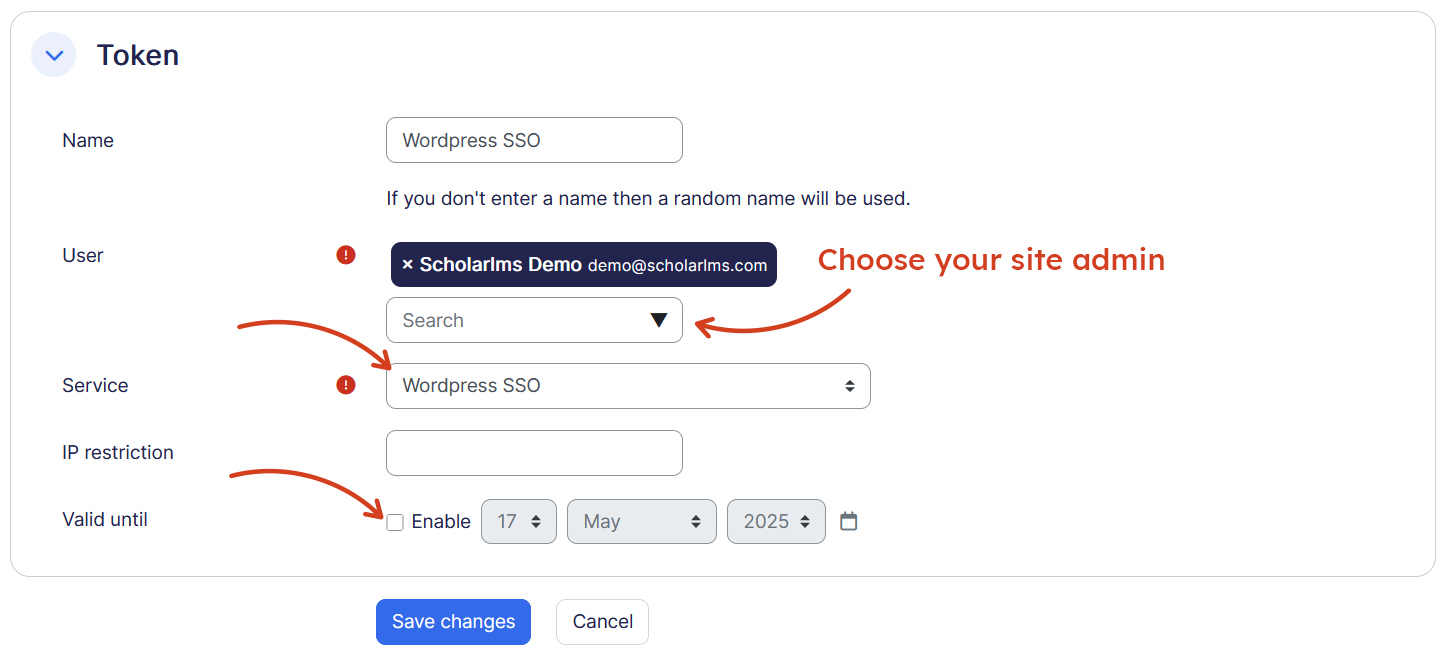
Step 2: On the Add Token page:
-
- Select the admin user
- Under Service, choose WordPress SSO
- Uncheck Valid until option
- Click Save changes
Step 3: Copy this webserivce token shown on this page — you’ll need it for the WordPress plugin configuration.
Warning: Make sure to copy the token now — it will no longer be visible once you leave or refresh this page.
Configuration on WordPress site #
Step 1: Download the ScholarLMS SSO plugin from here.
Step 2: Install the plugin via:
- WordPress dashboard → Plugins → Add New → Upload Plugin
or - FTP upload to /wp-content/plugins/
Step 3: Activate the plugin
Step 4: From the WordPress dashboard left navigation click ScholarLMS.
Step 5: Provide values to make integration between WordPress and ScholarLMS.
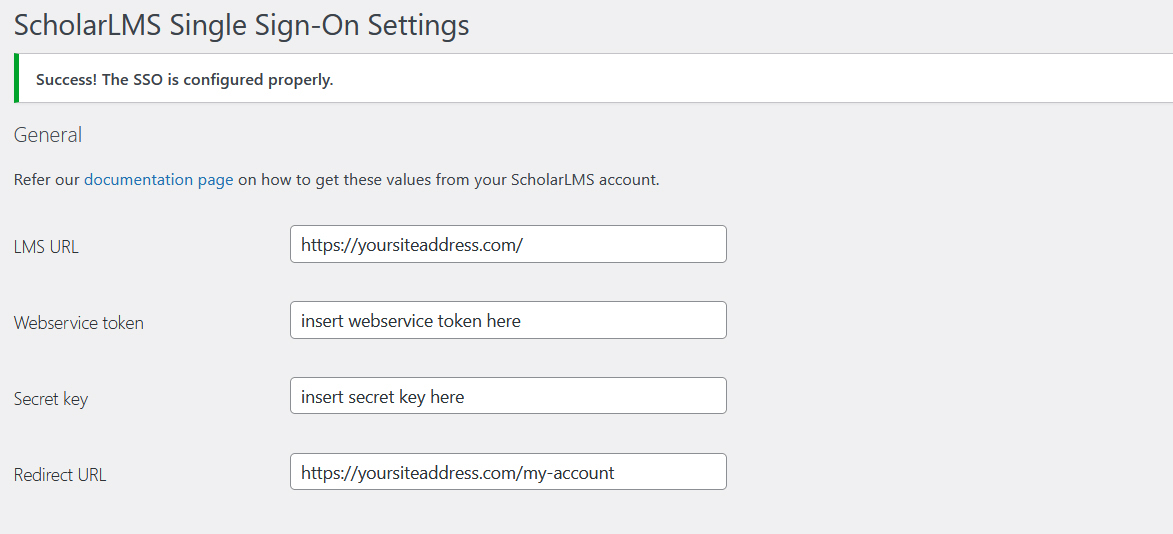
- ScholarLMS URL: Your ScholarLMS site URL (e.g., https://yourlms.scholarlms.com/)
- Web Service Token: Insert the web service token
- Secret Key: Insert the secret key
- Redirect URL: The page users should be redirected to after login (e.g., your My Account or Dashboard page on WordPress). This ensures a smooth user experience by sending them directly to the appropriate page after successful login.
Click Save Changes. If everything is configured correctly, you’ll see a success message.
(Optional) Map Custom User Profile Fields
After saving settings:
- You’ll see a list of LMS profile fields that can be mapped to WordPress user fields
- Use supported user meta shortcodes to match fields e.g. [GETUSERMETA key=’nickname’], [GETUSERMETA key=’phone’]