
This article explains how to create course categories, add courses in a category, and some other functions to better organize your LMS courses. Course categorization helps in organizing the courses and makes them easier to be searchable in the LMS. By default a course is put into ‘Main Category’ which can be renamed or completely changed from the ‘Manage courses’ page.
Adding a category #
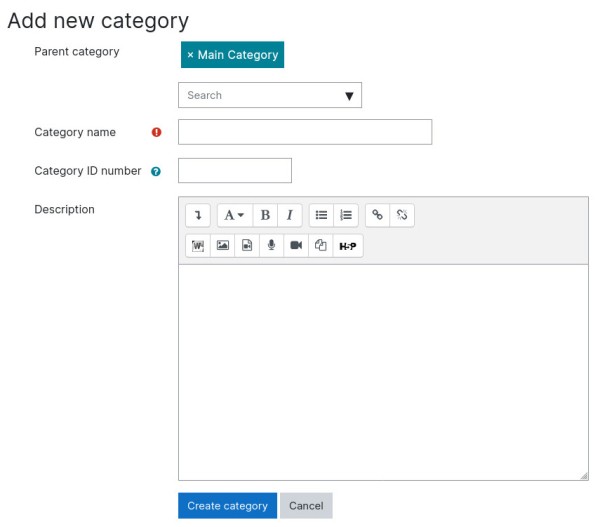
To add a course category, from left navigation, go to Courses -> Manage courses, you should see a category and courses page. On this page click on the “Create new category” link. Now you should see the add category page where you can see the following options.
- Parent Category – Select a parent category if this is going to be a subcategory of it.
- Category Name – Give a desired name for this category.
- Category ID – This is an optional field. The ID number of the category is only used when matching a category with an external application and is not displayed anywhere in the LMS.
- Description – This is an optional field. You can write a meaningful description to refer to in future.
Course categories set up here do not sync with product categories of the store.
Category actions #
There are several actions that can be taken on a category, let’s explore them.
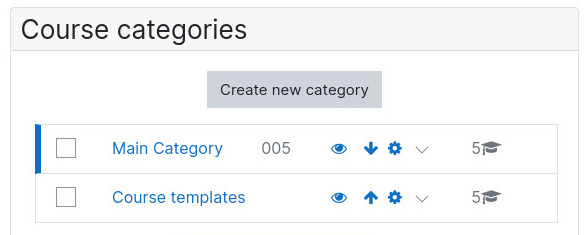
- Show/Hide category – The eyeball icon shows or hides the category, sub-categories, and all the courses within it. Be careful while hiding a category as it will make all the courses within it unavailable to the enrolled users of those courses. Hidden categories are only visible to site administrators or those with the capability to “view hidden courses”.
- Move category – You can move category up or down by clicking the up/down arrow next to the category you wish to move.
- More options – You can access more options from the ‘cog/gear’ icon. From this option you can
- Edit the category
- Create a new subcategory within the category
- Delete it
- Assign roles – From category-wide role users may be enrolled in the category to save enrolling them in each individual course in that category.
- Cohorts – Creates a category-wide cohort.
- Restore course – Allows you to restore a course in the category
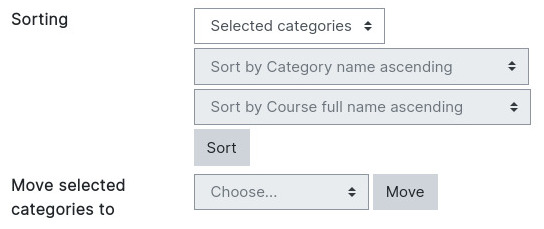
- Sort categories – Categories may be sorted by ascending/descending names or ID numbers.
- Move categories – This option allows you to move categories into another category (or subcategory) or make a subcategory a top category.
Course actions #
On selecting a category, a block appears on the right side listing courses which belong to this category.
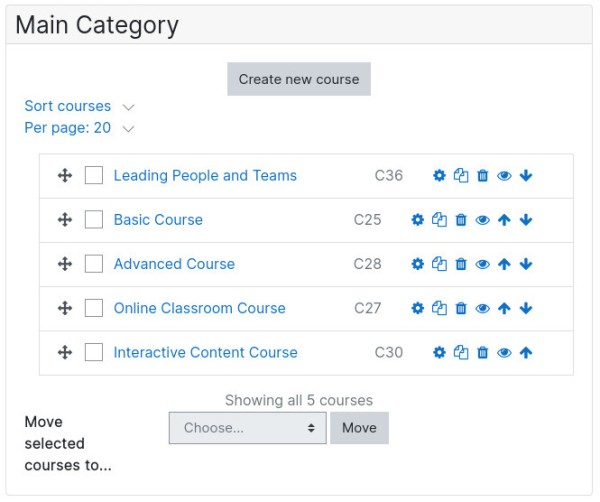
There are several actions for a course you can take from this block. Let’s explore them.
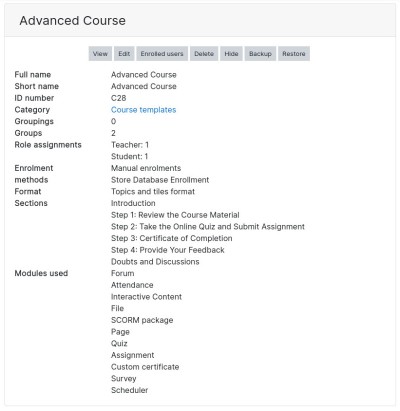
- Course details – Clicking on the course name shows some important details of the course.
- Move course – You can move the course up or down either by clicking the move icon (the first icon) or by the up/down arrow icon (the last icon) next to the course.
- Show/Hide course – The eyeball icon shows or hides the course. Be careful while hiding a course as it will make it unavailable to the enrolled users of the course.
- Copy course – Allows you to make a copy of this course. Explore our detailed guide on how to copy a course.
- Delete – You can delete a course from the bin icon next to the course. Cautiously use this option as this action can’t be undone.