The Attendance activity allows teachers to maintain a record of Attendance, replacing or supplementing a paper-based Attendance register. It is primarily used in blended-learning environments where students are required to attend classes, lectures and tutorials and allows the teacher to track students’ Attendance.
To take Attendance, the instructor clicks on the “Update Attendance” button and is presented with a list of all the students in that course, along with configurable options and comments. The default options provided are: Present, Absent, Late & Excused.
What can be done with Attendance:
- Students’ Attendance can be graded.
- The instructor can create single or multiple Attendance sessions.
- Sessions can also be configured to allow students to record their own Attendance.
- Attendance activity comes with a default status set “Present”, “Absent”, “Late”, or “Excused” alternatively instructor may modify the statuses to suit their organization’s needs.
- Reports are available for the entire class or individual students.
- Instructors can download the Attendance for their course in Excel format or text format.
Adding Attendance activity. #
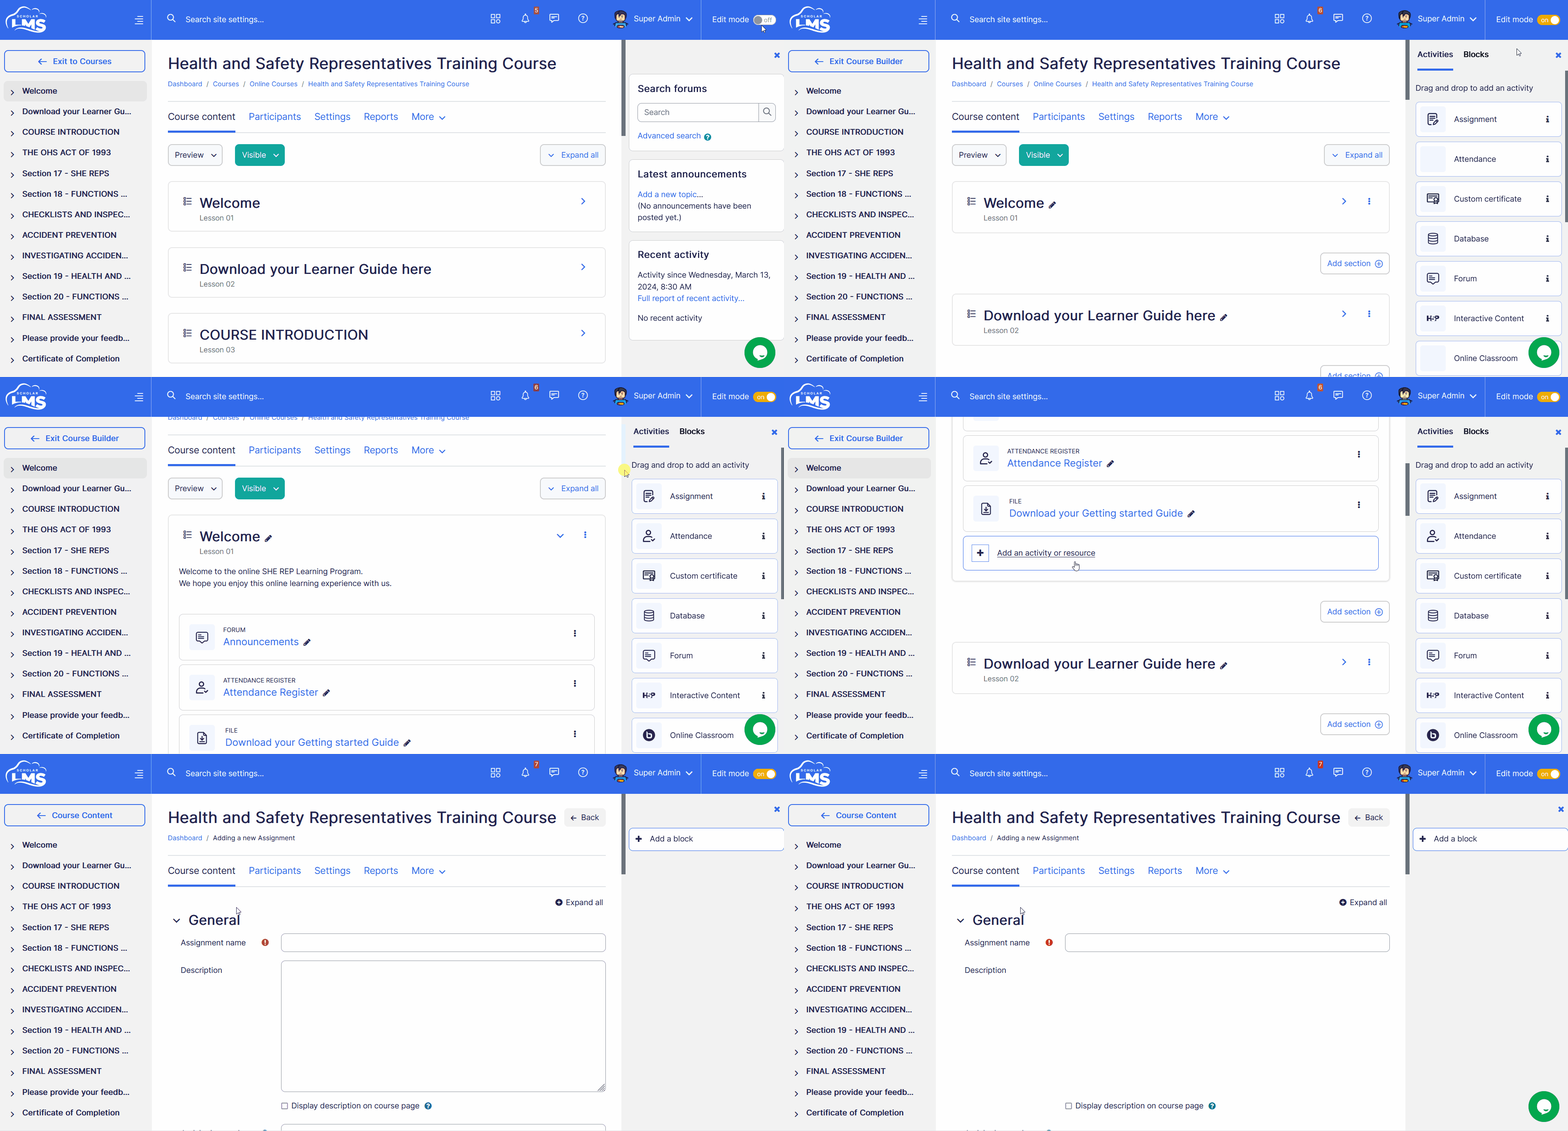
To add an Attendance, navigate to the desired course. If not already enabled, activate edit mode. Then, within the preferred section, click the ‘Add an Element’ button. Alternatively, you can drag and drop the Attendance from the right sidebar.
Attendance settings #
This section explores the settings for Attendance once you have added it to the course.
General #
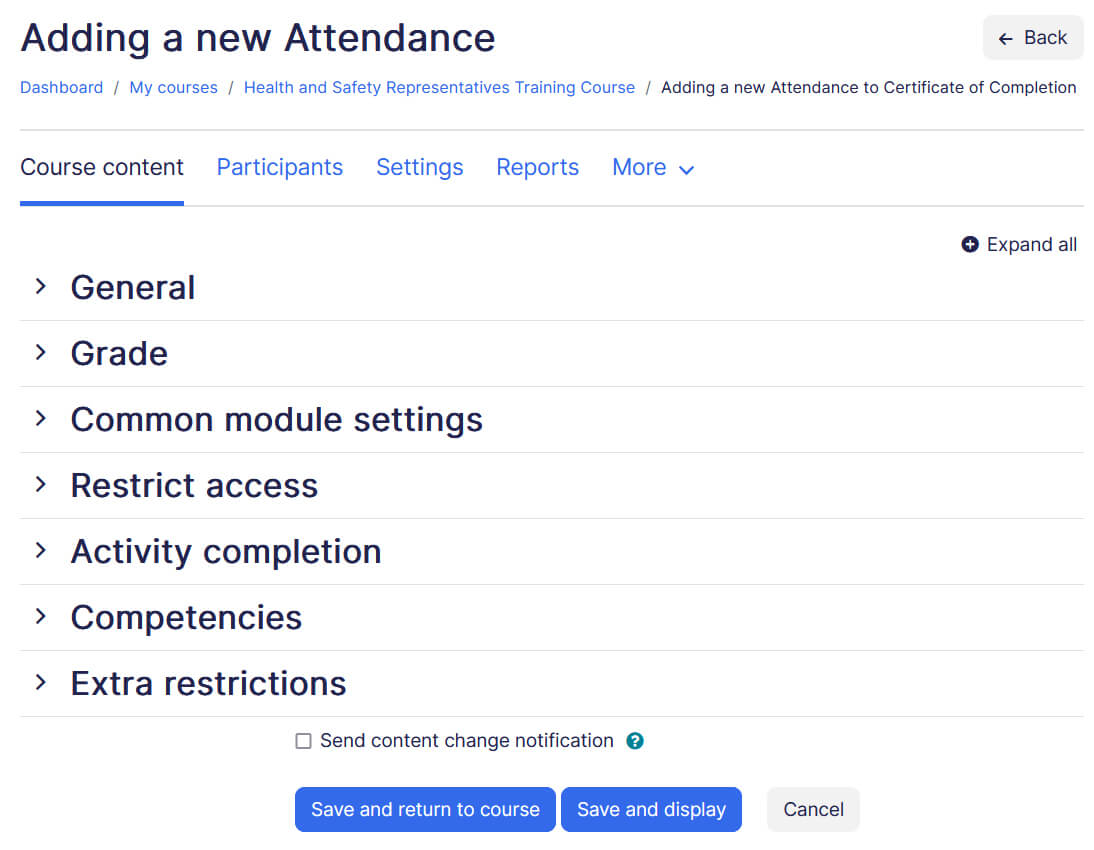
- Name – This is a mandatory field. Put in the name as you desire for the Attendance instance.
- Description – Any details about the Attendance could be put in here. If the box below this section is checked, it will enable the description to be displayed on the course page below the link to activity.
Grades #
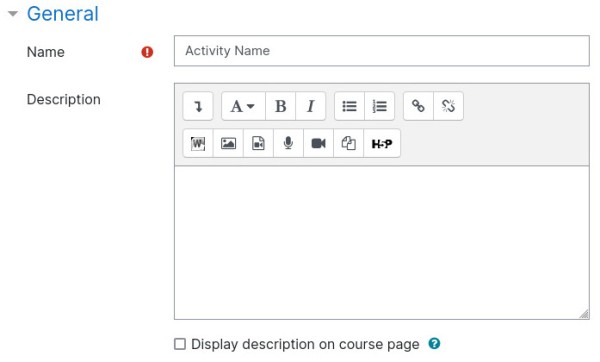
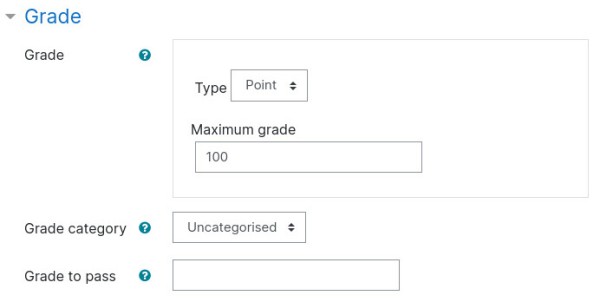
Allows you to set up grades for the Attendance.
- Grade – Select the type of grading to be used for this activity. If ‘scale’ is chosen, you can then choose the scale from the dropdown menu. If using ‘point’ grading, you can then enter the maximum grade available for this activity.
- Grading category – This setting controls the category in which this activity’s grades are placed in the gradebook.
- Grade to pass – This setting determines the minimum grades required to pass. The value is used in activity and course completion, and in the gradebook, where pass grades are highlighted in green and fail grades in red.
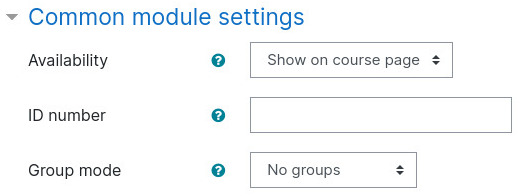
Common module settings (optional) #
- Availability – If the availability is set to ‘Show on course page’, the activity or resource is available to students (subject to any access restrictions which may be set). If the availability is set to ‘Hide from students’, the activity or resource is only available to users with permission to view hidden activities (by default, users with the role of teacher or non-editing teacher).
- ID number – Setting an ID number provides a way of identifying the activity or resource for purposes such as grade calculation or custom reporting. Otherwise the field may be left blank. For gradable activities, the ID number can also be set in the gradebook, though it can only be edited on the activity settings page.
- Group mode – The group mode defined at course level is the default mode for all activities within the course. Each activity that supports groups can also define its own group mode, though if the group mode is forced at course level, the group mode setting for each activity is ignored. This setting has 3 options:
- No groups
- Separate groups – Each group member can only see their own group, other members are invisible
- Visible groups – Each group member works in their own group, but can also see other groups
Restrict access #
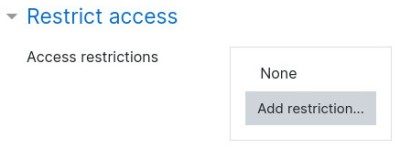
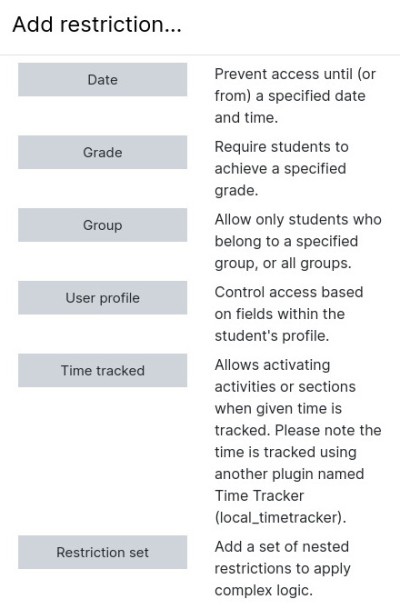
The restrict access feature enables teachers to restrict the availability of any activity according to certain conditions such as dates, grade obtained, group, user profile field, time spent on a different activity, or activity completion. A complex logic can be used with nested restrictions. To know more, explore our detailed guide on access restriction.
Alternatively, an activity can be hidden from students until they are ready to be used.
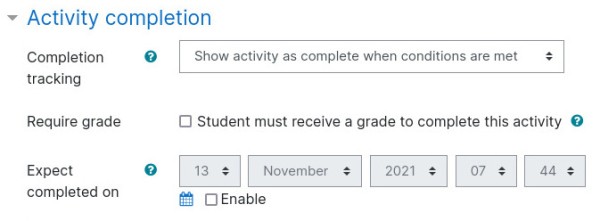
Activity completion #
Activity completion allows you to set completion criteria which basically decides when to consider the activity is completed. The following options are available:
- Students can manually mark the activity completed, here you allow students to make this decision.
- Activity is considered complete when certain conditions are fulfilled, where one or more conditions can be added.
- Student must receive a grade to complete the activity
- A date of expected completion of the activity
Competencies (optional) #
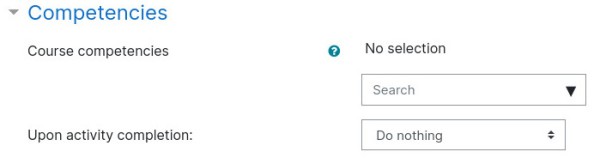
Allows you to link competency to the activity. To know more, explore our guide on Competencies.
Extra restrictions (optional) #
Attendance recording may be restricted to particular subnets by specifying a comma-separated list of partial or full IP addresses. This is the default value used when creating new sessions.

Status set #
Before adding Attendance sessions, instructors should review the default Attendance status set and customize it as needed according to your organization’s requirements. You can access the status set page through the ‘More‘ dropdown menu in the course navigation.
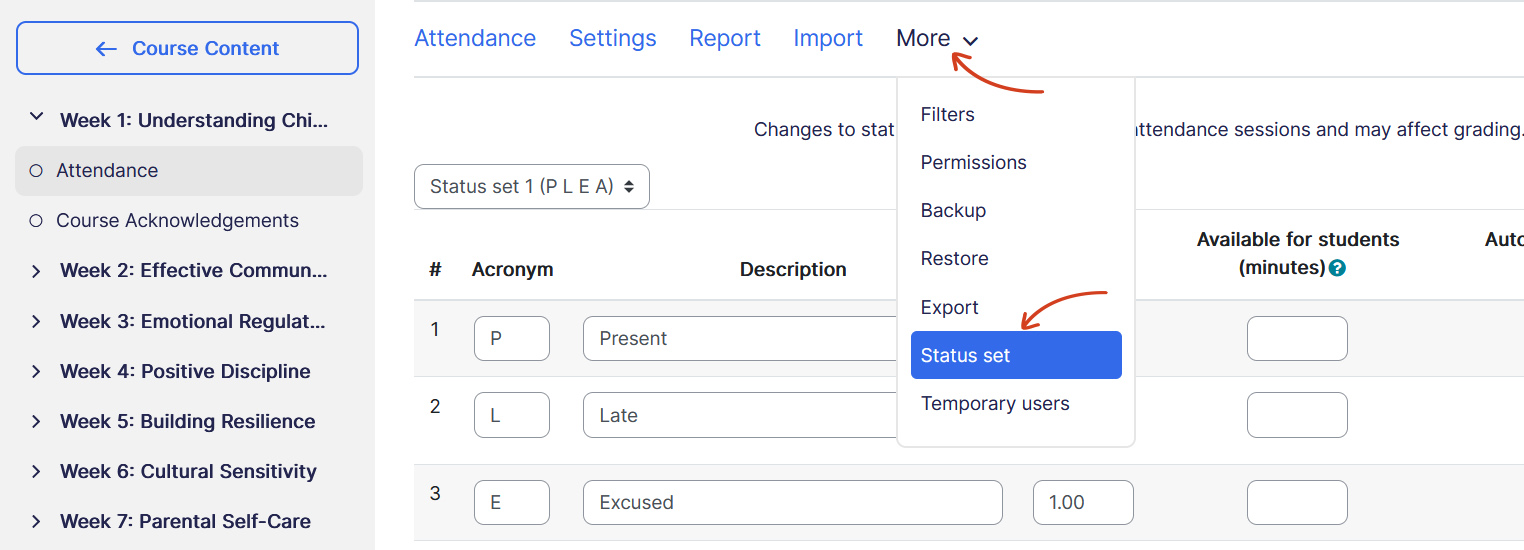
From Attendance status page, you can:
- Either use default P.L.E.A. (Present, Late, Excused, Absent) statuses or define your own.
- Add Acronym, Description, Points, and choose Automatic marking.
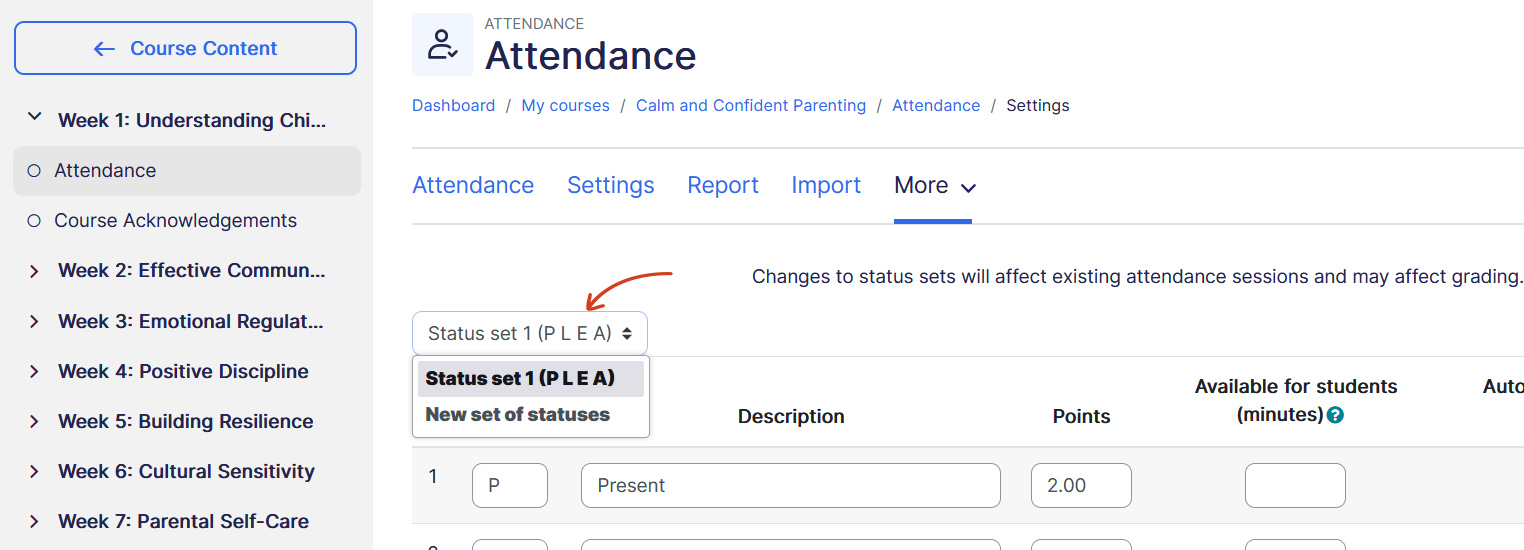
Define your own Status set
To define your own status set, click on the dropdown menu and select “New set of statuses.” It is recommended to create a new set of statuses rather than editing the existing set labeled as “Status set 1 (P L E A).”
Adding Attendance session #
After adding an Attendance activity, you can create Attendance sessions, including multiple recurring sessions if desired.
To add Attendance sessions:
- Click on Add session button that opens sessions page.
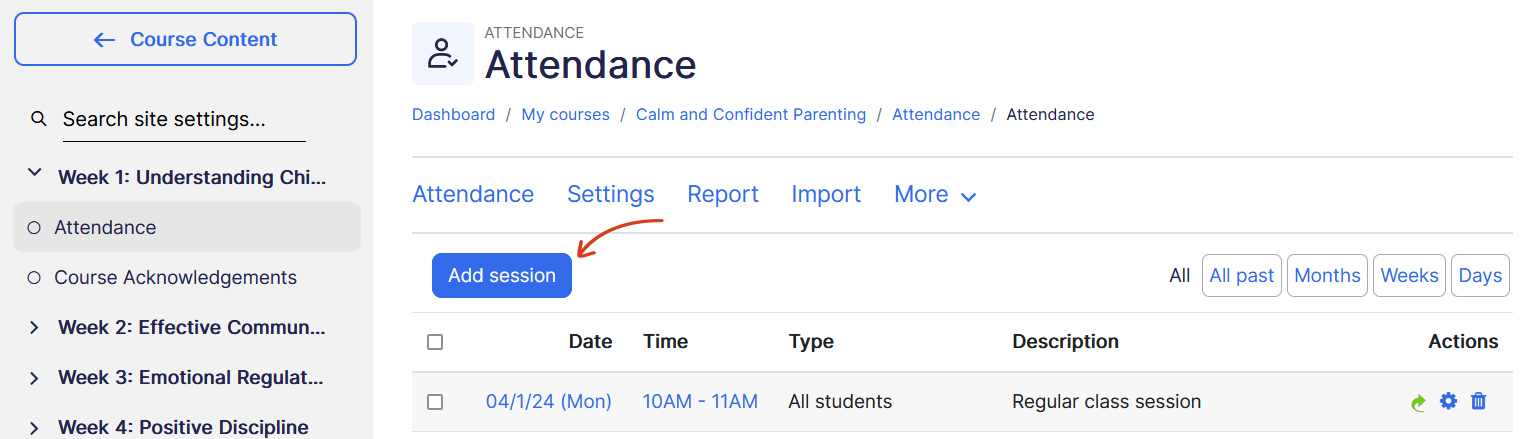
- Add session tab
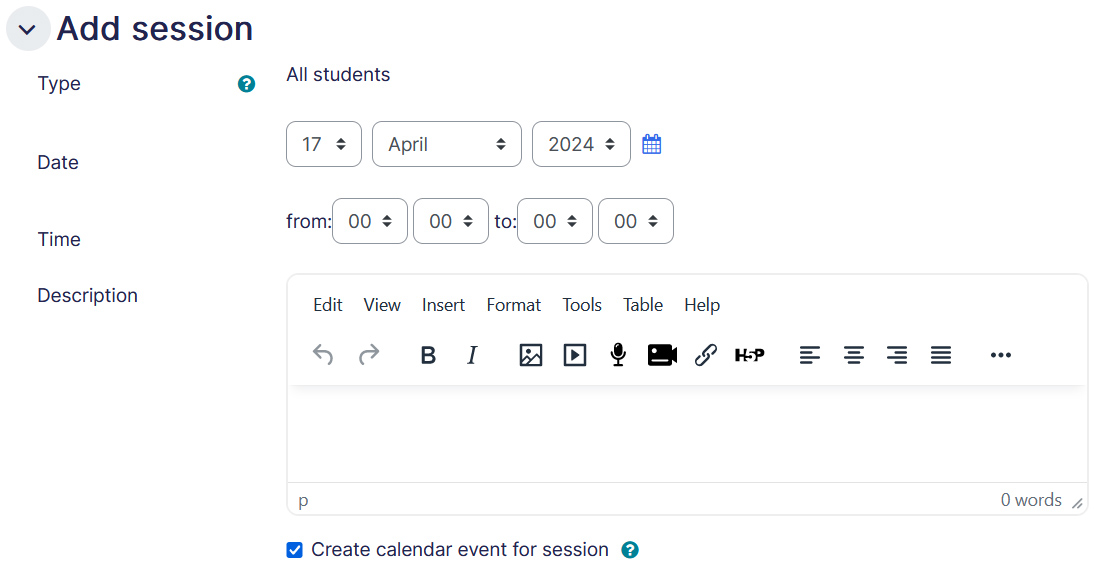
- Date — Attendance date, for repeated sessions, this will the from date.
- Time — Attendance time, for repeated sessions, this will the from time.
- Description — Optional, add description for future reference.
- Create calendar event — Checking this box will create calendar even for each Attendance session.
- Multiple sessions tab
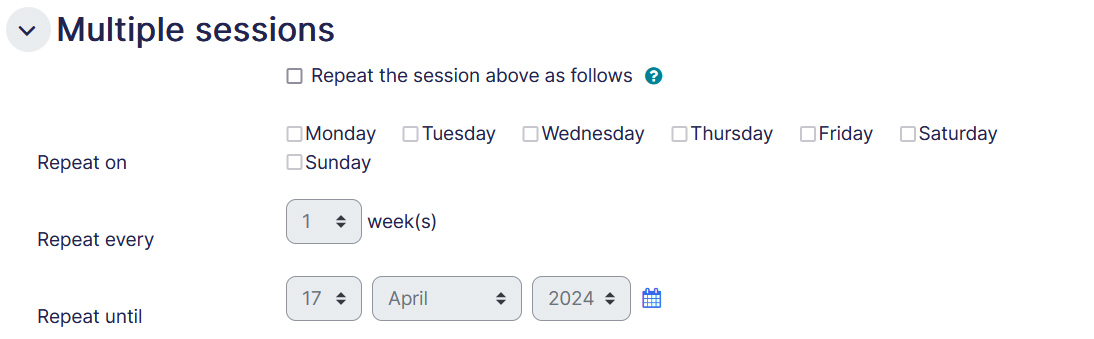
- Repeat sessions — Check this box to repeat the above session, this will provide further options for repeating sessions.
- Repeat on — Check days on which days the above session should repeat, it will repeat on the selected weekdays for the same time.
- Repeat every — With this you can control if the sessions should be repeated every week or every other week, and so on.
- Repeat until — With this option set the end date of repetition. For obvious reason this must be atleast one day after the from date above.
- Student recording tab

- Allow student record own Attendance — If checked students will be able to change their own Attendance status for the session.
- Automatic marking — Allows Attendance marking to be completed automatically. If “Yes” students will be automatically marked depending on their first access to the course. If “Set unmarked at end of session” any students who have not marked their Attendance will be set to the unmarked status selected. “On activity completion” it will push automatic marking.
Note: Sessions are hidden if they are scheduled before the course start date. You can use this feature to hide older sessions instead of deleting them. Only visible sessions will appear in the Gradebook.
Recording Attendance #
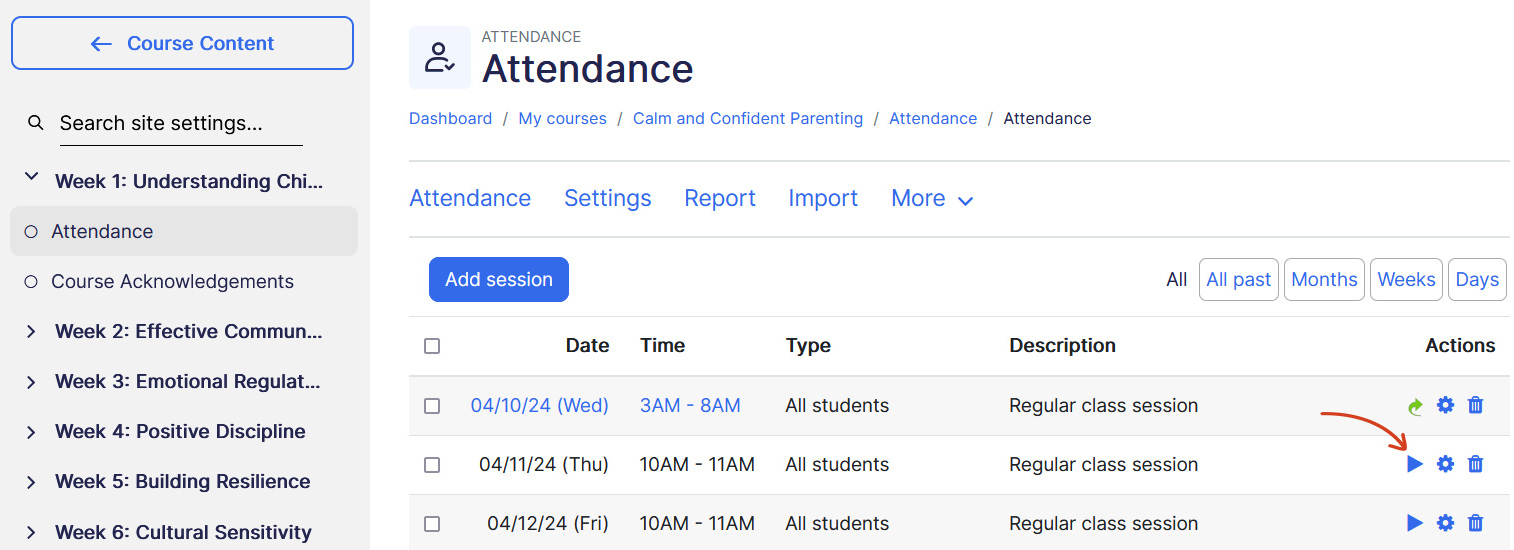
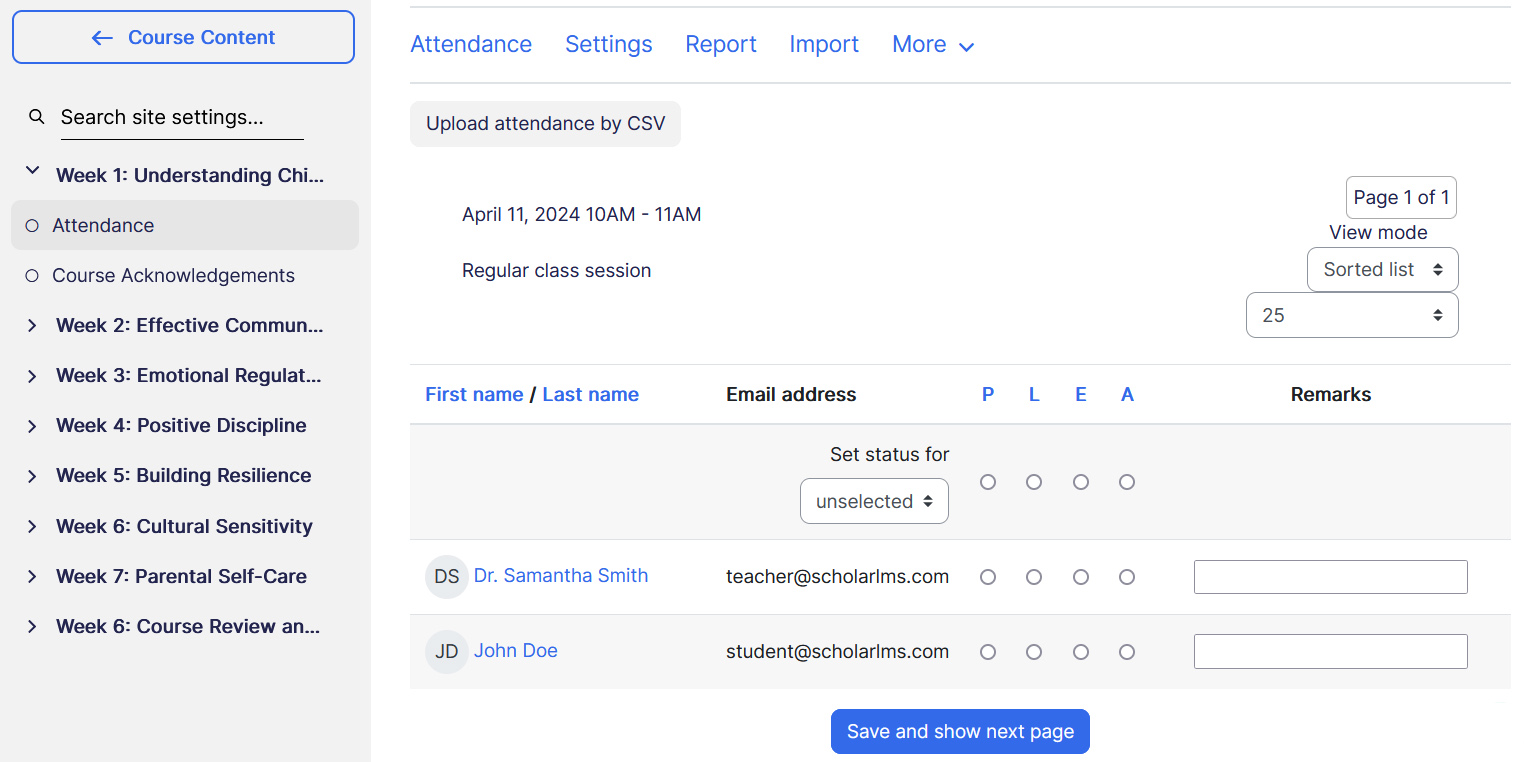
To record Attendance for a session, click on the record session icon which takes to new page to record participants’ Attendance.
Temporary user #
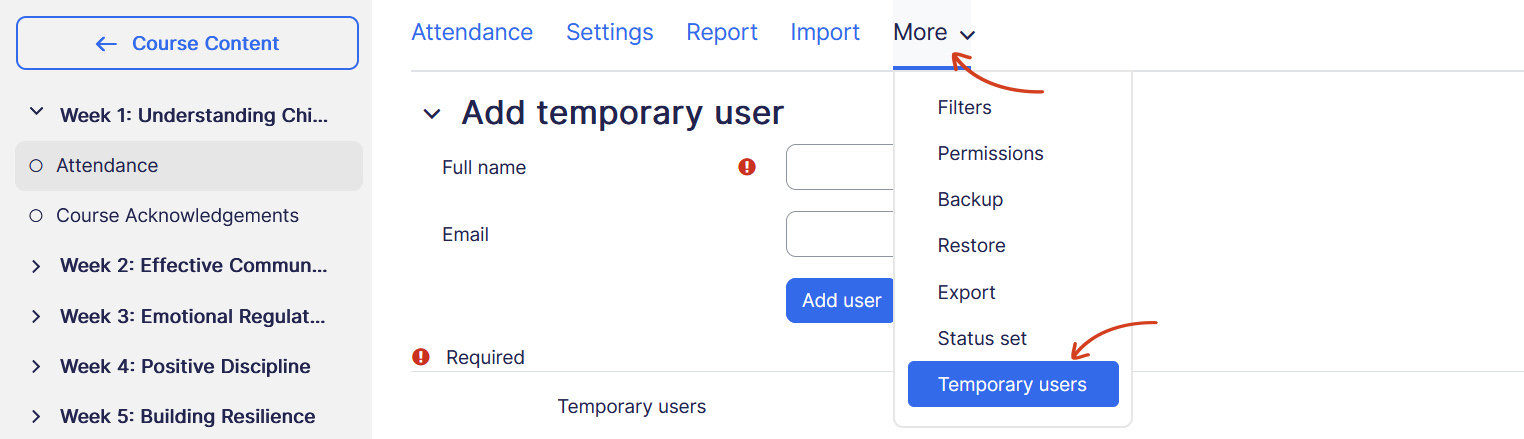
Temporary user feature in Attendance allows you to add a user that might not be existing in your site, maybe this user exists in offline records. To add a temporary user for Attendance record, reach to Temporary page from course navigation’s More dropdown menu.
Assignment block #
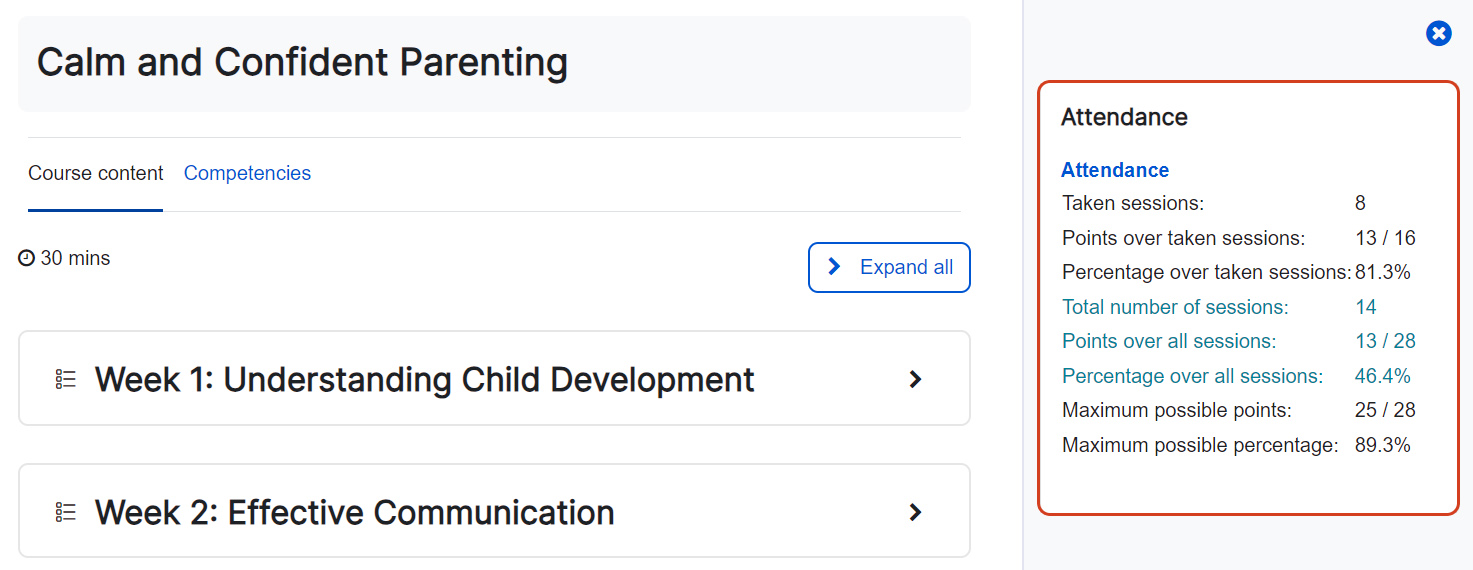
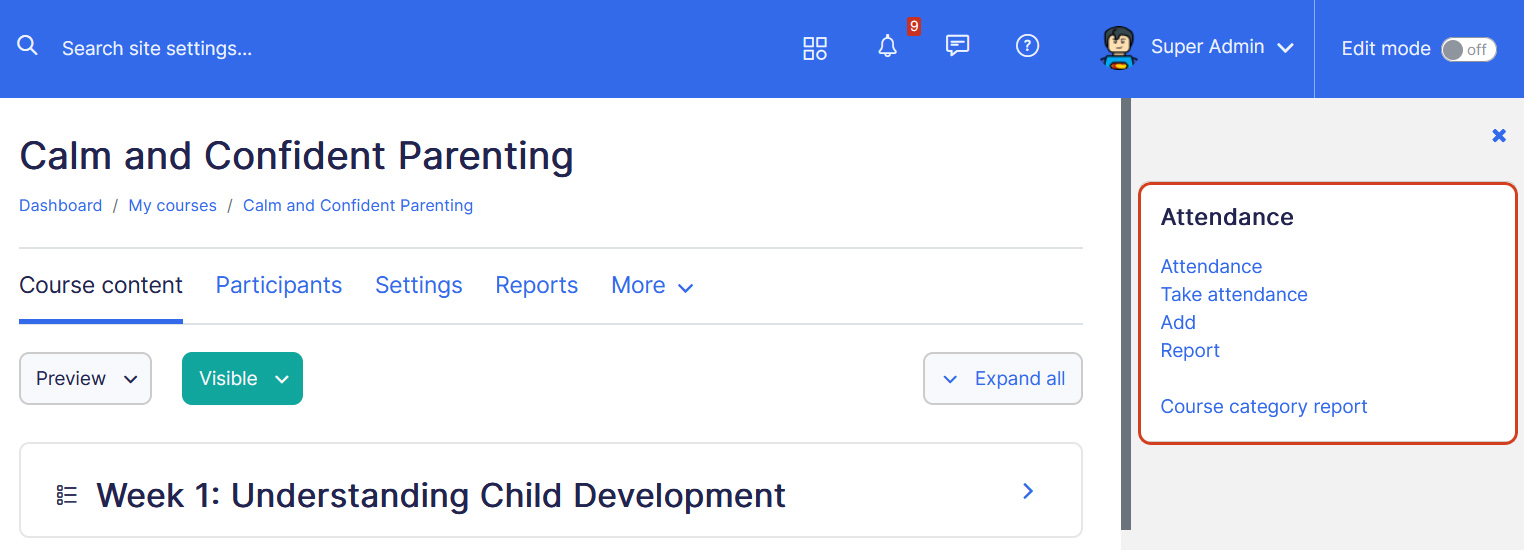
The Assignment block works with the Attendance activity, it provides teachers with quick access to Attendance functionality, and provides students quick access to a summary report for their own Attendance.
To add Attendance block:
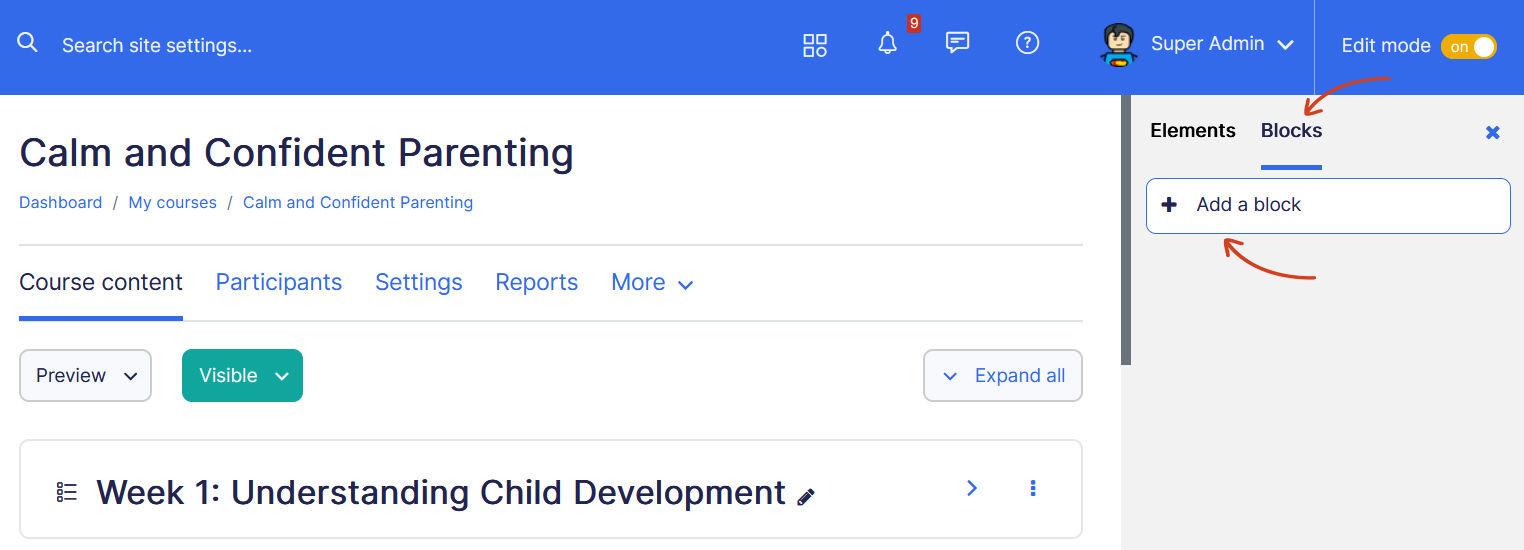
- Click on the Add a block button on the right side bar.
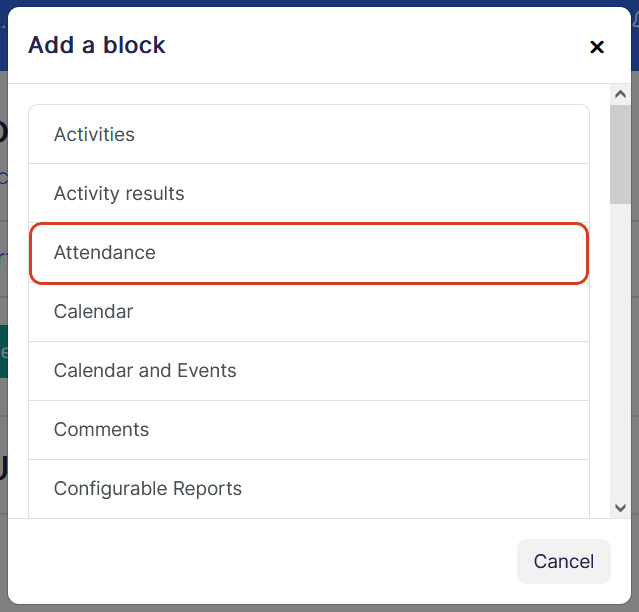
- From the picker, choose Attendance
The block is added on the right side bar, and provide direct links for Attendance activity, take Attendance, add sessions and access report right from this block.
Student view #
Let’s take a look at how students experience the Attendance page and Attendance block from their perspective.
Attendance page view #
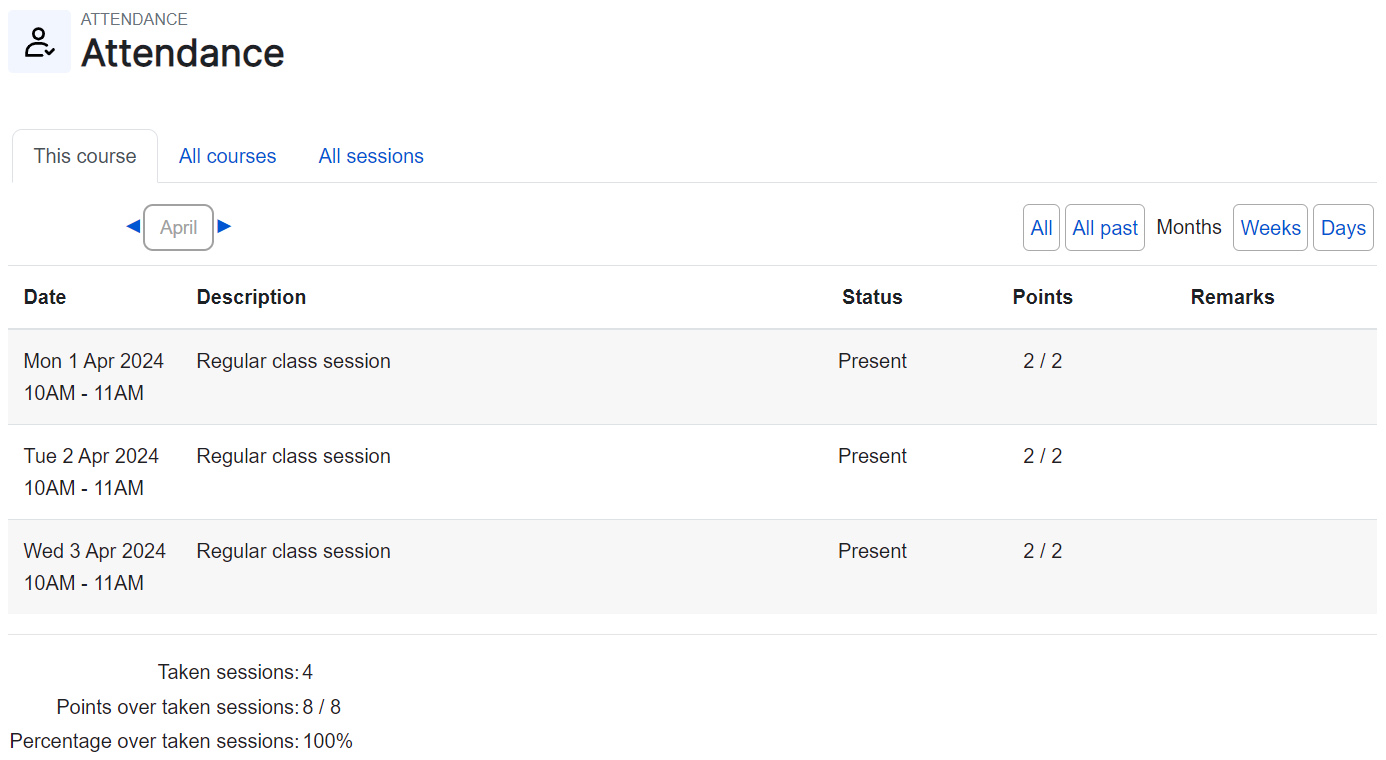
From the Attendance page, students can view their Attendance records for the current course, all the courses they are enrolled in, or all sessions across the site.
Attendance block on course page #
The Attendance block on the course page gives students an overview of all their Attendance sessions. It also provides a direct link to the Attendance activity for easy access.