
The File module enables a teacher to provide a file as a course resource. Where possible, the file will be displayed within the course interface; otherwise students will be prompted to download it.
Note that the students need to have an appropriate application on their computers in order to open a file.
Adding a file #
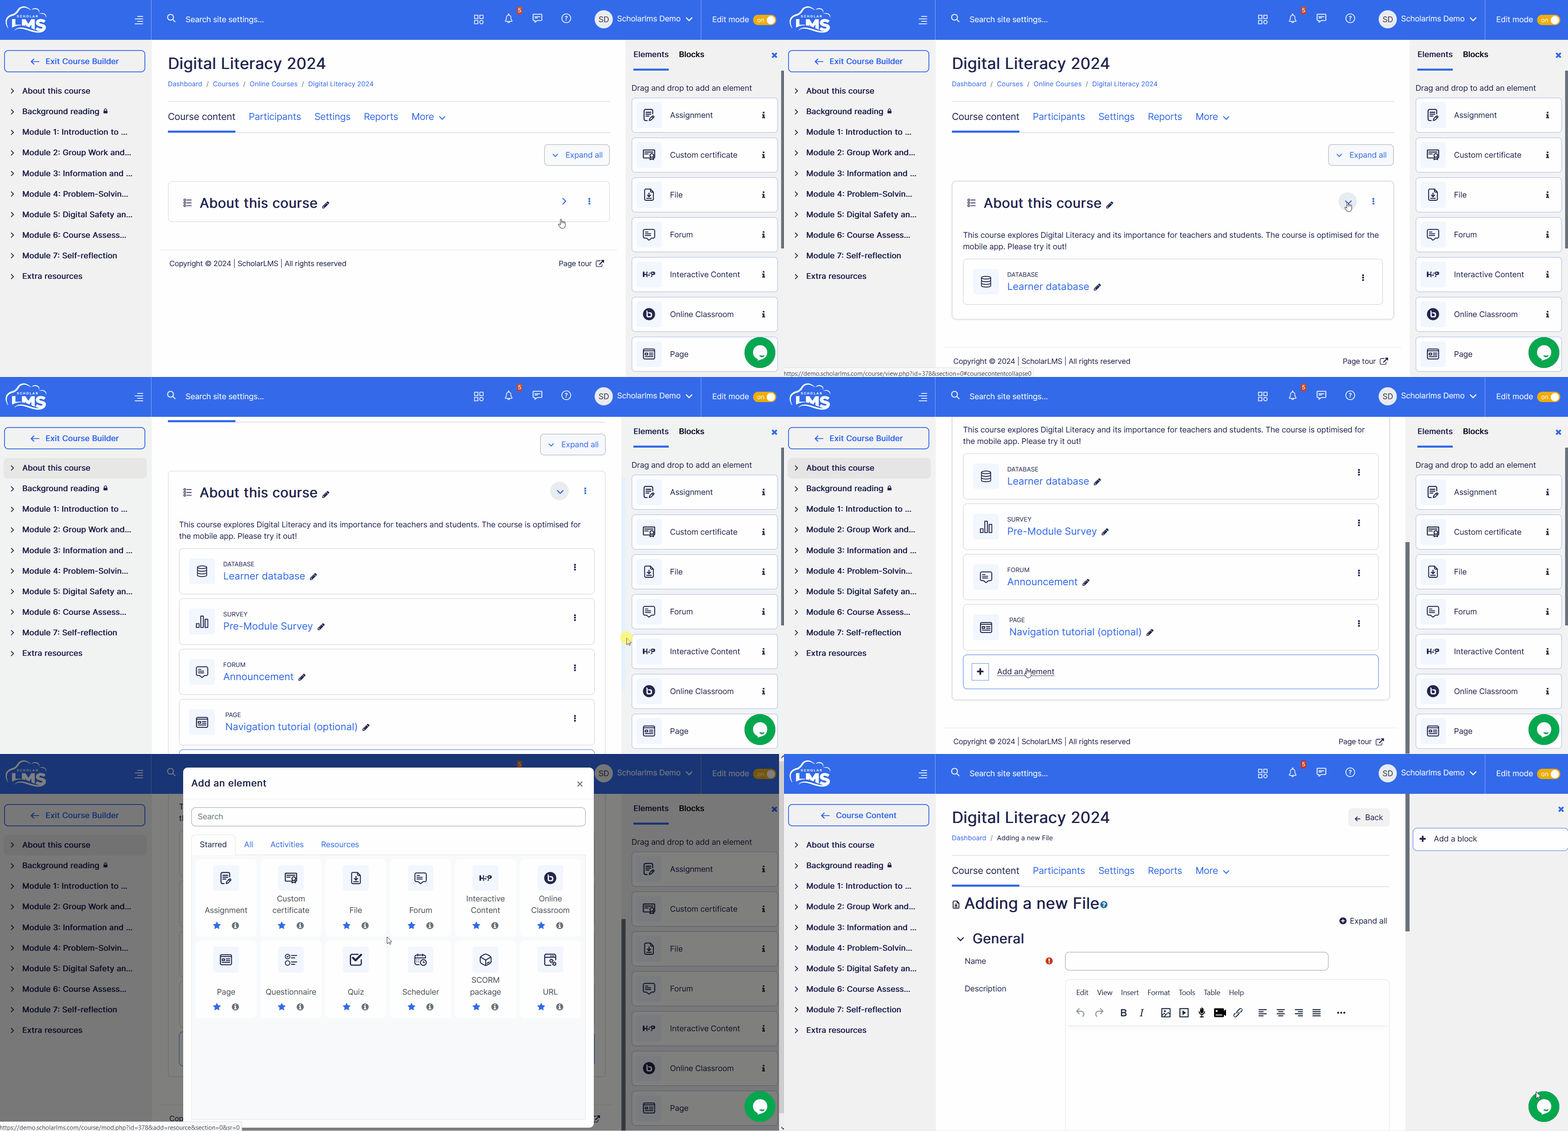
To add a File resource:
- Navigate to the Courses page.
- Click on “Edit” under Actions for the desired course.
- This takes to Course Builder page. Ensure that the Edit mode is activated on the Course Builder page.

- Navigate to the Course Section, click the ‘Add an element’ button, which opens a pop up window, add File.
File settings #
This section explores the file settings once you have added it to your course.
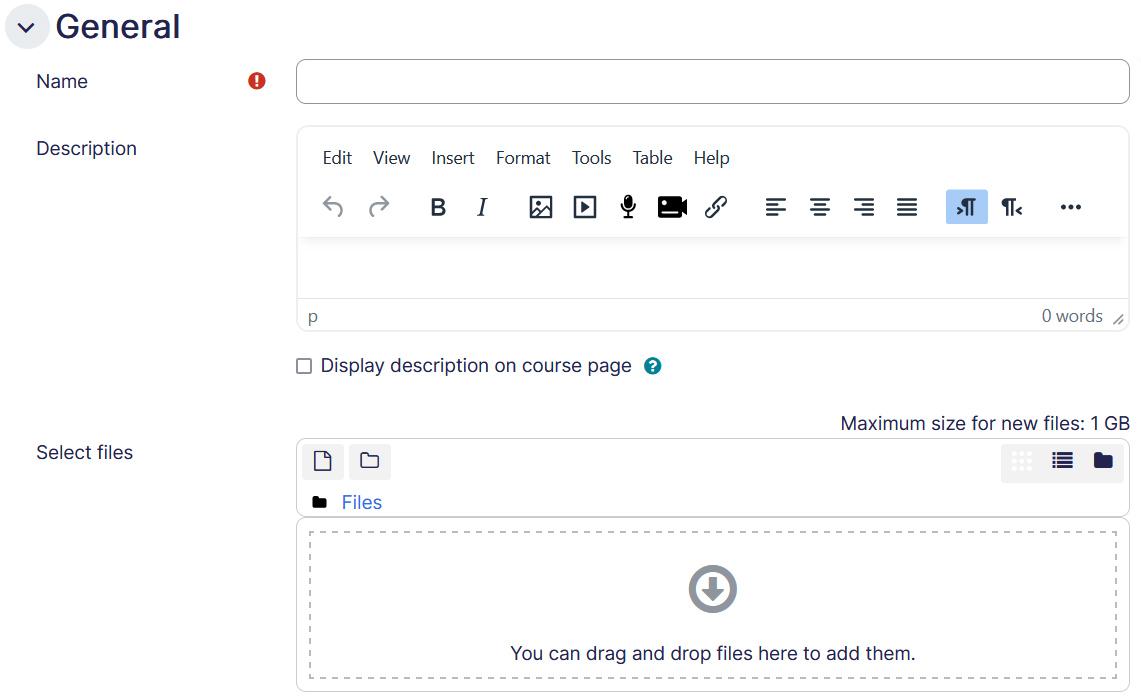
General
- Name – This is a mandatory field. Put in the name as you desire for the Page.
- Description – Any details about the Page could be put in here. If “” is enabled, it will display the description on the course page below the page title.
- Select files – Drag and drop files from your computer to upload.
Appearance
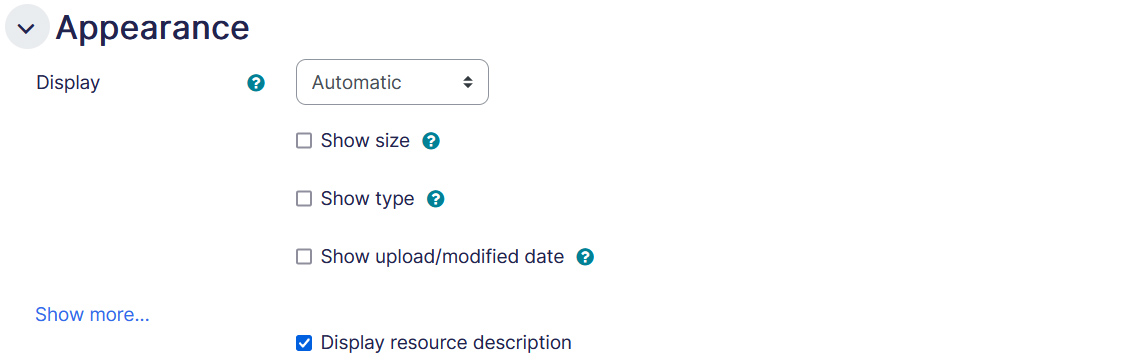
There are a few ways to display the file. Depending on the file format the page may prompt students to download it, and open it from their computer. The student must have the necessary application to open the file. For instance, a word file will need MS word, or Libre word applications.
Display Options
- Automatic — Make the best guess at what should happen (probably what is wanted 99% of the time).
- Embed — Show the file page with heading, blocks and footer. Show the title/description of the item and display the file directly in the page as well (good for images, flash animations, videos, PDFs).
- Force download — User clicks on the file, then the web browser pops up with the ‘open with/where do you want to save this file’ dialogue.
- Open — No heading, blocks, footer or description – just show the file in the web browser (e.g. shows image, PDF, flash animation, taking up the whole browser window)
- In pop-up — Same as ‘Open’, but opens a new browser window to show this file (without the heading, blocks etc) – also this browser window does not have all the menus and address bar in it.
- Show size — Displays the file size, beside the link of the file. If there are multiple files, the size of all the files in total will be displayed.
- Show type — Displays the file type, beside the link of the file. If there are multiple files, the file type of the first file will be displayed.
- Show upload/modified date — Displays the upload/modified date, beside the link of the file. If there are multiple files, the upload/modified date of the first file will be displayed.
Common module settings
- Availability – If the availability is set to ‘Show on course page’, the activity or resource is available to students (subject to any access restrictions which may be set). If the availability is set to ‘Hide from students’, the activity or resource is only available to users with permission to view hidden activities (by default, users with the role of teacher or non-editing teacher).
- ID number – Setting an ID number provides a way of identifying the activity or resource for purposes such as grade calculation or custom reporting. Otherwise the field may be left blank. For gradable activities, the ID number can also be set in the gradebook, though it can only be edited on the activity settings page.
- Group mode – The group mode defined at course level is the default mode for all activities within the course. Each activity that supports groups can also define its own group mode, though if the group mode is forced at course level, the group mode setting for each activity is ignored. This setting has 3 options:
- No groups
- Separate groups – Each group member can only see their own group, others are invisible
- Visible groups – Each group member works in their own group, but can also see other groups
Restrict access
The restrict access feature enables teachers to restrict the availability of any activity according to certain conditions such as dates, grade obtained, group, user profile field, time spent on a different activity, or activity completion. A complex logic can be used with nested restrictions. To know more, explore our detailed guide on access restriction.
Alternatively, an activity can be hidden from students until they are ready to be used.

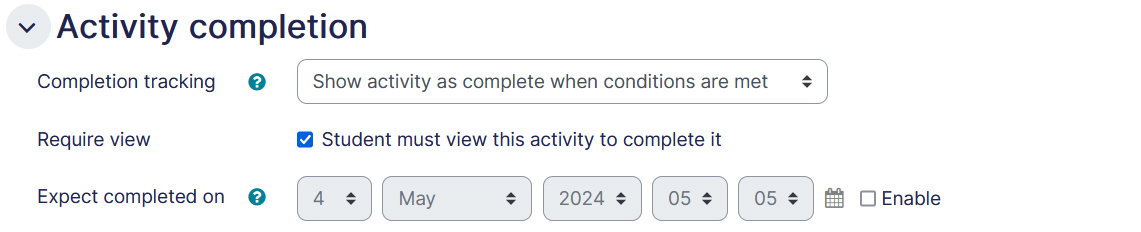
Activity Completion
Activity completion allows you to set completion criteria which basically decides when to consider the activity is completed. The following options are available:
- Students can manually mark the activity completed, here you allow students to make this decision.
- Activity is considered complete when certain conditions are fulfilled, where one or more conditions can be added.
- A date of expected completion of the activity
Competencies
Allows you to link competency to the activity. To know more, explore our guide on Competencies.