
The Manual Enrollment feature allows administrators or instructors to directly enroll users into courses without requiring any automated processes. This manual process gives administrators or instructors control over who is enrolled and when. They can navigate to the course, search for the desired user, and enroll them manually.
Please note that a user account must already exist before manually enrolling in a course.
To manually enroll user in a course:
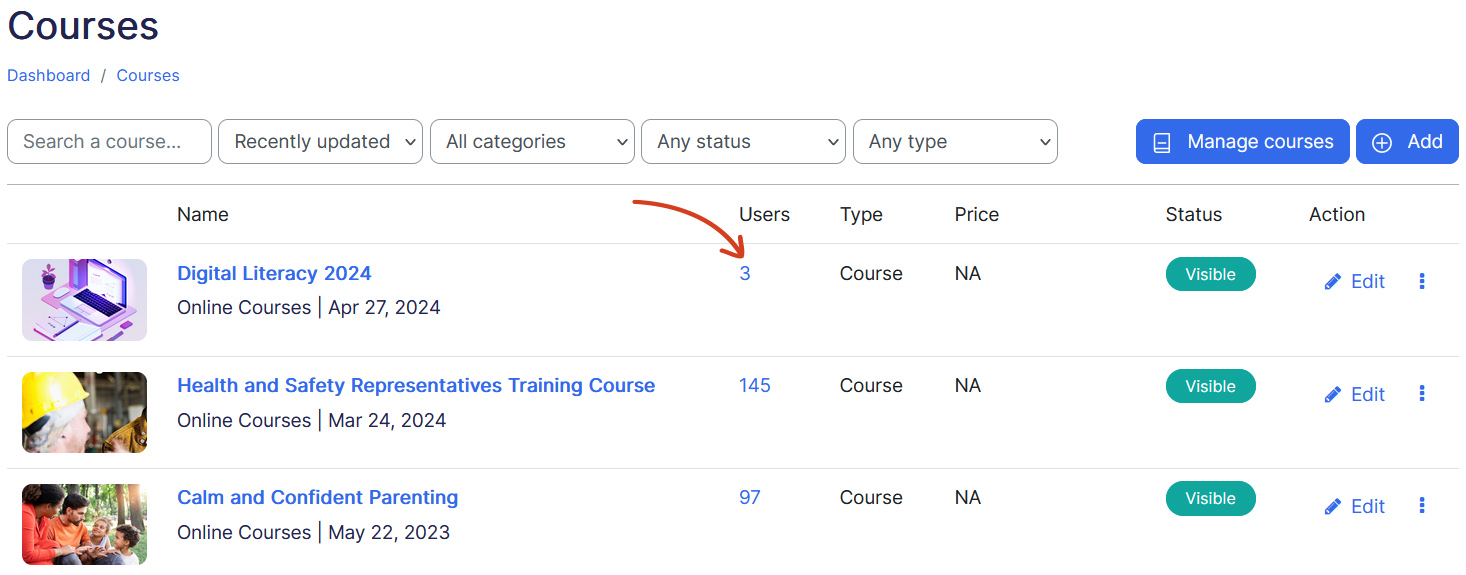
- On Courses page, click on the course users which takes you to the course course participants page.
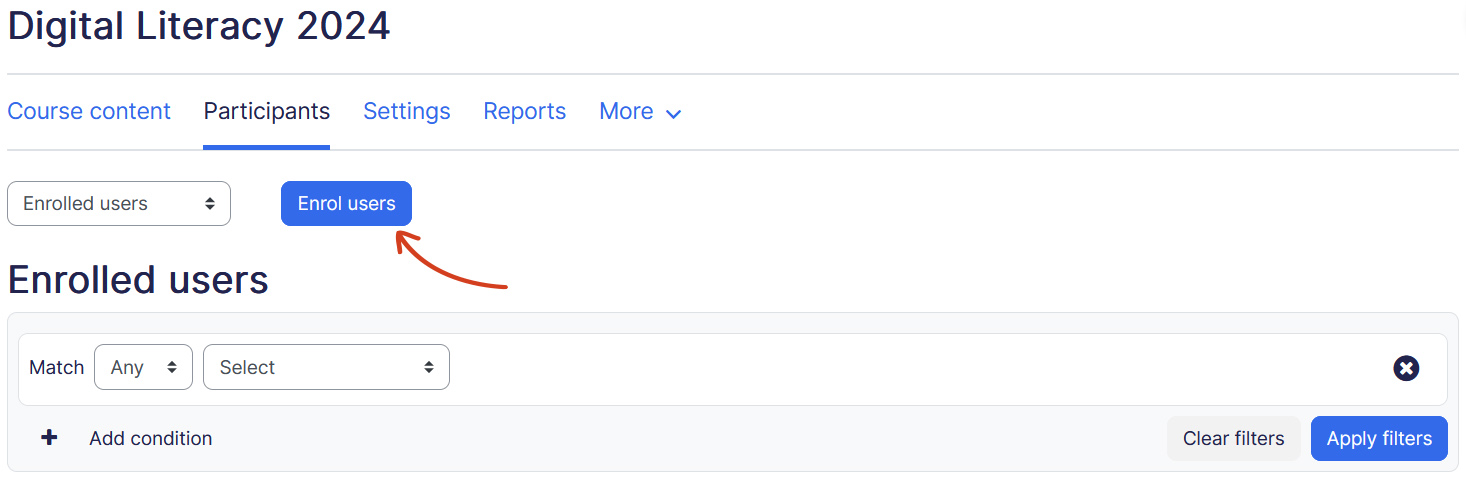
- On course participants page, click on Enroll users button.
- A pop-up window opens where you can search the user and choose enrollment options.
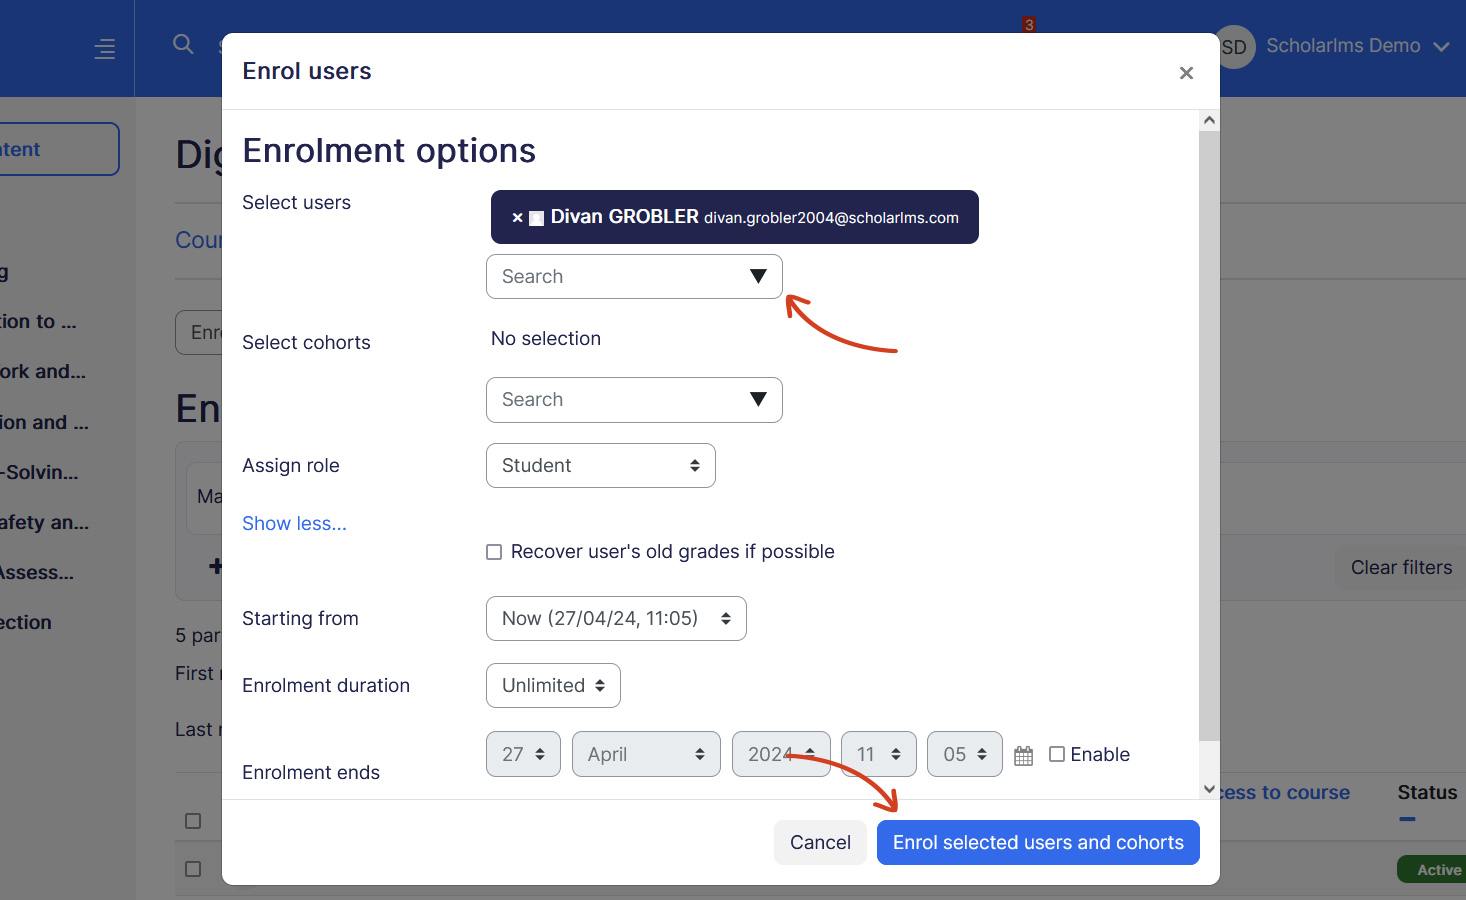
- Select users — Allows you to search a user with their name or email. Click to add the user, you can add multiple users as well.
- Select Cohorts — You can enroll users from a Cohort. Read more about Cohorts.
- Assign role — You can choose the role while enrollment, usually this should be a student. Read more about other user roles.
- Recover grades — When this setting is enabled, the grades will be automatically recovered on re-enrollment with any enrollment method, not just manual – such as “Cohort Sync”, “Self-enrolment”, etc. including the 3rd party enrollment plugins. Please note that grades are recovered from the grade history. If the grade history is disabled, the grades recovery will not work even if enabled.
- Starting from — Choose from course start date, today, or now options.
- Enrollment duration — Select the duration of the enrollment, indicating how long users should have access to this course.
- Enrollment end date — Choose this option if there is a specific end date for the user’s enrollment, indicating the last day of the user’s access to this course.
- Once done, click on Enroll selected users button.
User enrollment actions
You can take three actions on an enrolled user. These actions provide administrators or instructors with more flexibility in managing changes to a user’s enrollment details.
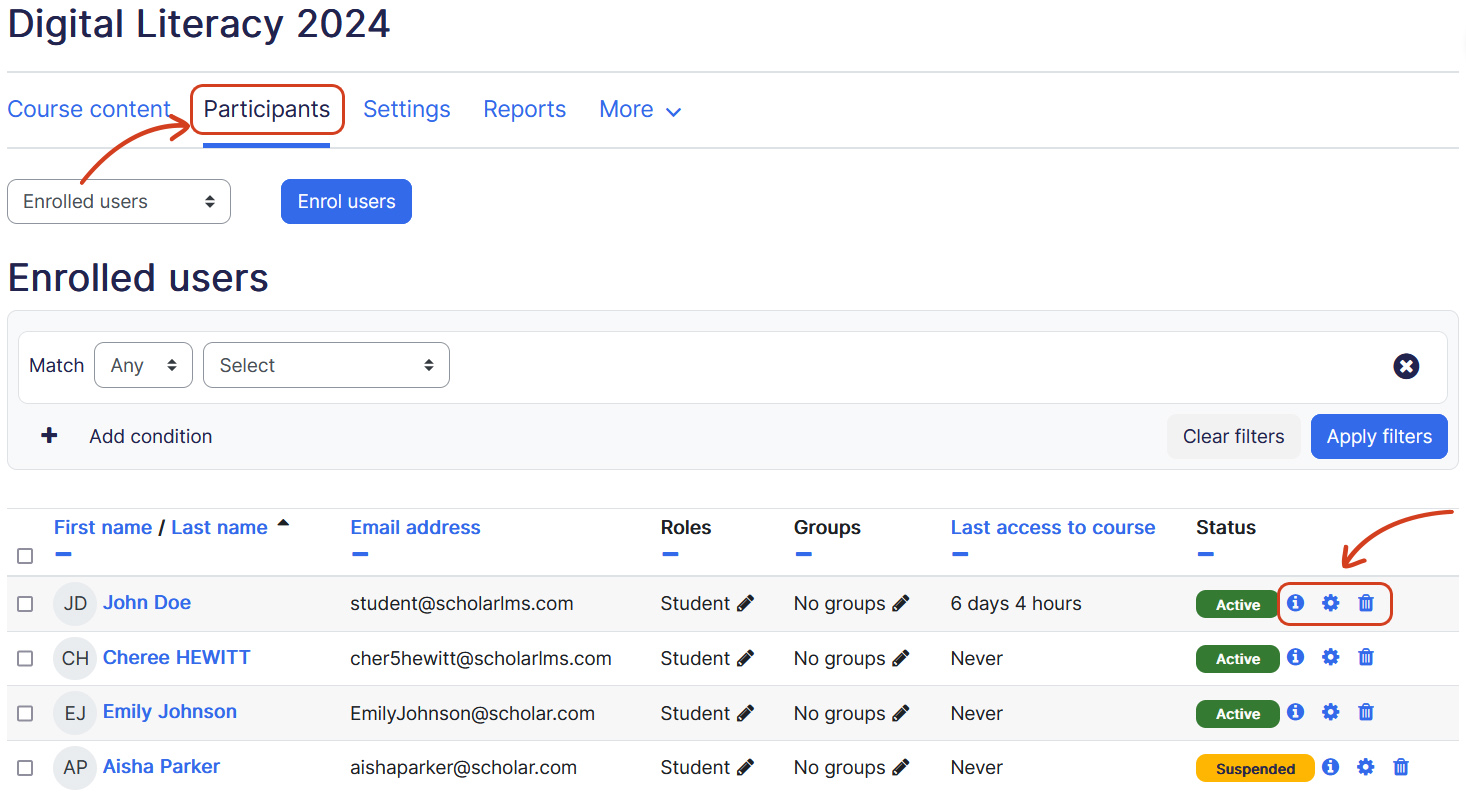
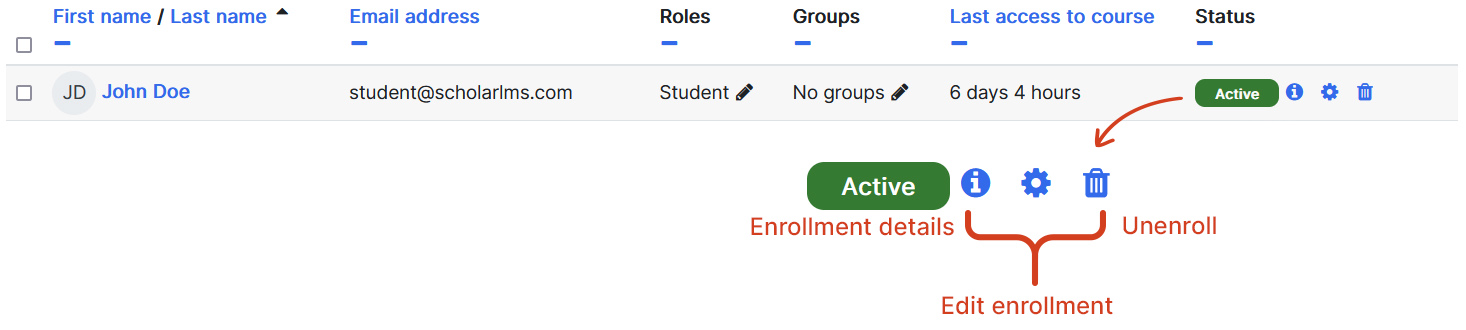
- Enrollment details — Opens a pop-up window showing user’s enrollment details.
- Edit enrollment details — Click on the cog icon to make any changes on user’s enrollment.
- Unenroll — Clicking on the trash icon will unenroll the user, deleting all of their course progress. Be cautious, as this action cannot be undone.
How to suspend user enrollment
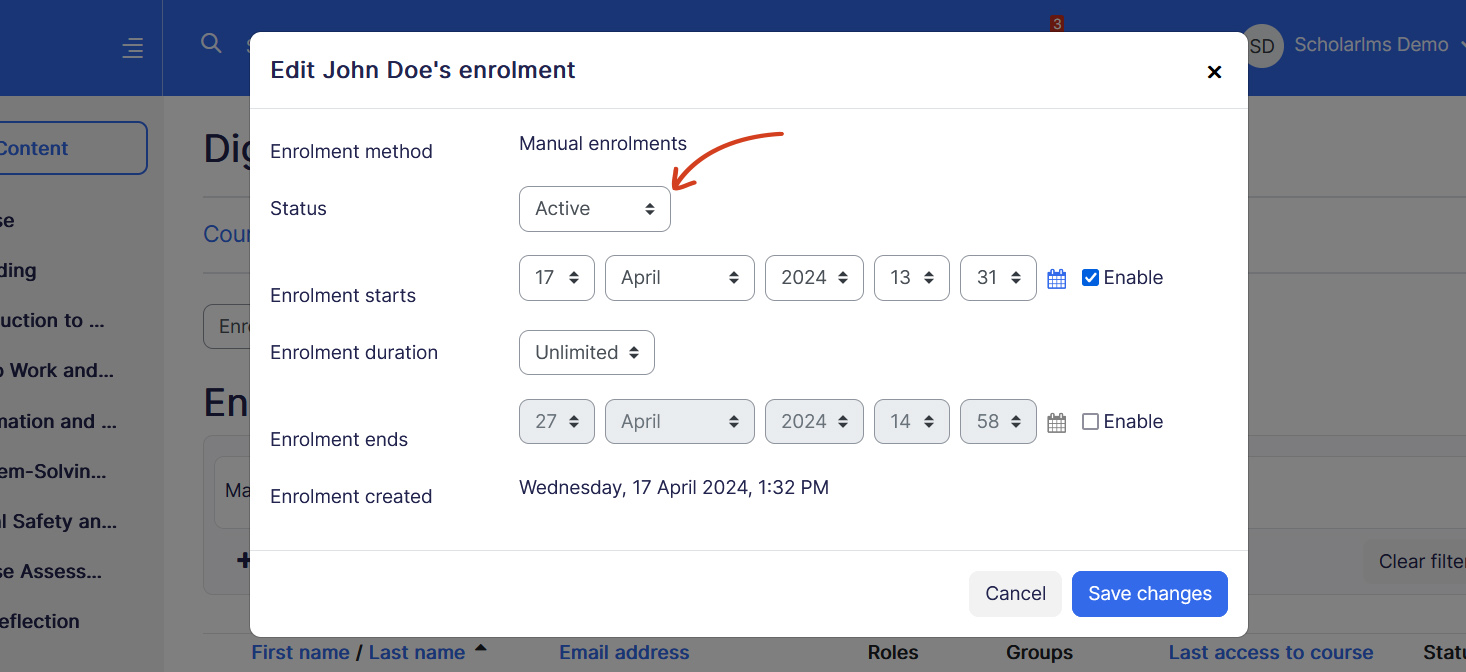
To suspend user enrollment, click on the Edit enrollment (cog icon). It opens a pop up window, change status from Active to Suspend.
Difference between suspend and unenrollment actions
When you suspend a user’s enrollment, you are disabling the user’s access to the course, while keeping all of the user’s course progress intact. On the other hand, unenrollment action will delete the user’s course progress.
Use cases:
- Suspend: Suspend a user’s enrollment when you want to temporarily prevent them from accessing the course, perhaps due to non-payment, a temporary leave of absence, or a violation of policies. This allows you to maintain their progress and re-enable their access later without loss of data.
- Unenrollment: Unenroll a user from a course when you want to permanently remove their access and delete their progress. This could be necessary when a user has completed the course long ago, withdrawn from the program, or is no longer eligible for access.